User Interface
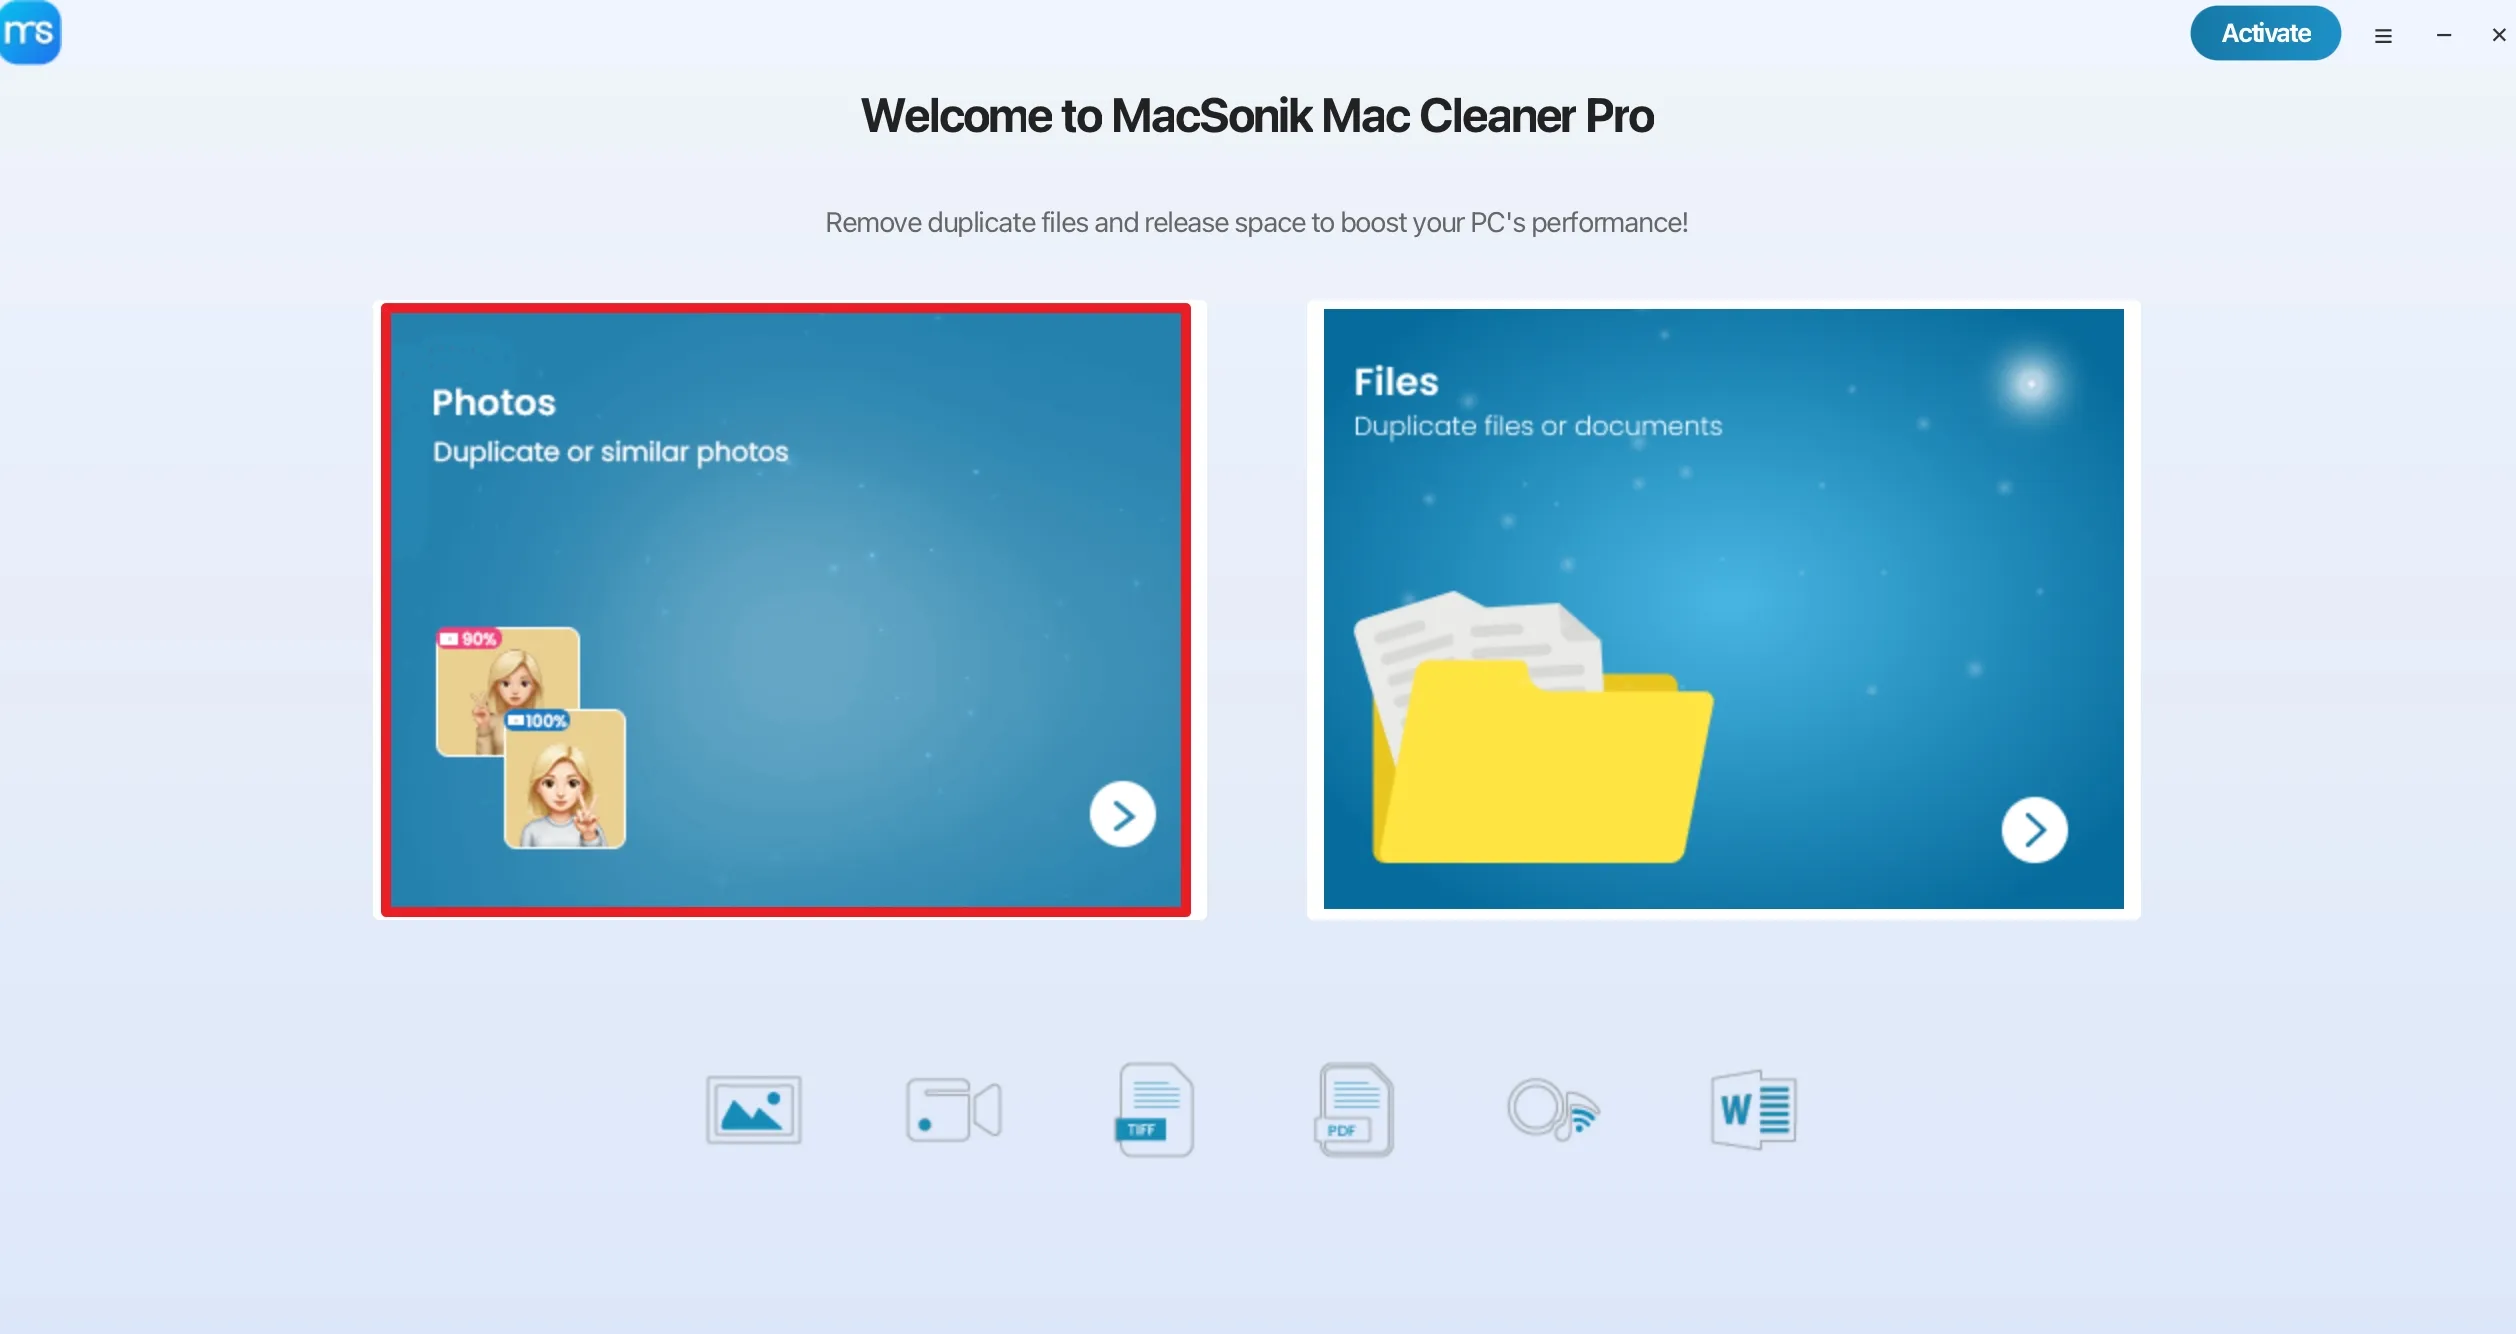
Firstly, start launching the ‘MacSonik Mac Cleaner Pro Software’ and choose ‘Files.’
 Tap to
purchase the software.
Tap to
purchase the software.
 Click to
activate the software.
Click to
activate the software.
 To know
the Software.
To know
the Software.
 Tap for
any assistance.
Tap for
any assistance.
Process to Remove Duplicate Photos
In the next panel, the following:
‘Scan’ Option: Provides settings to adjust the ‘Similarity Threshold’ (how closely photos must match) and the ‘Minimum Photo Size’ to refine your search results.
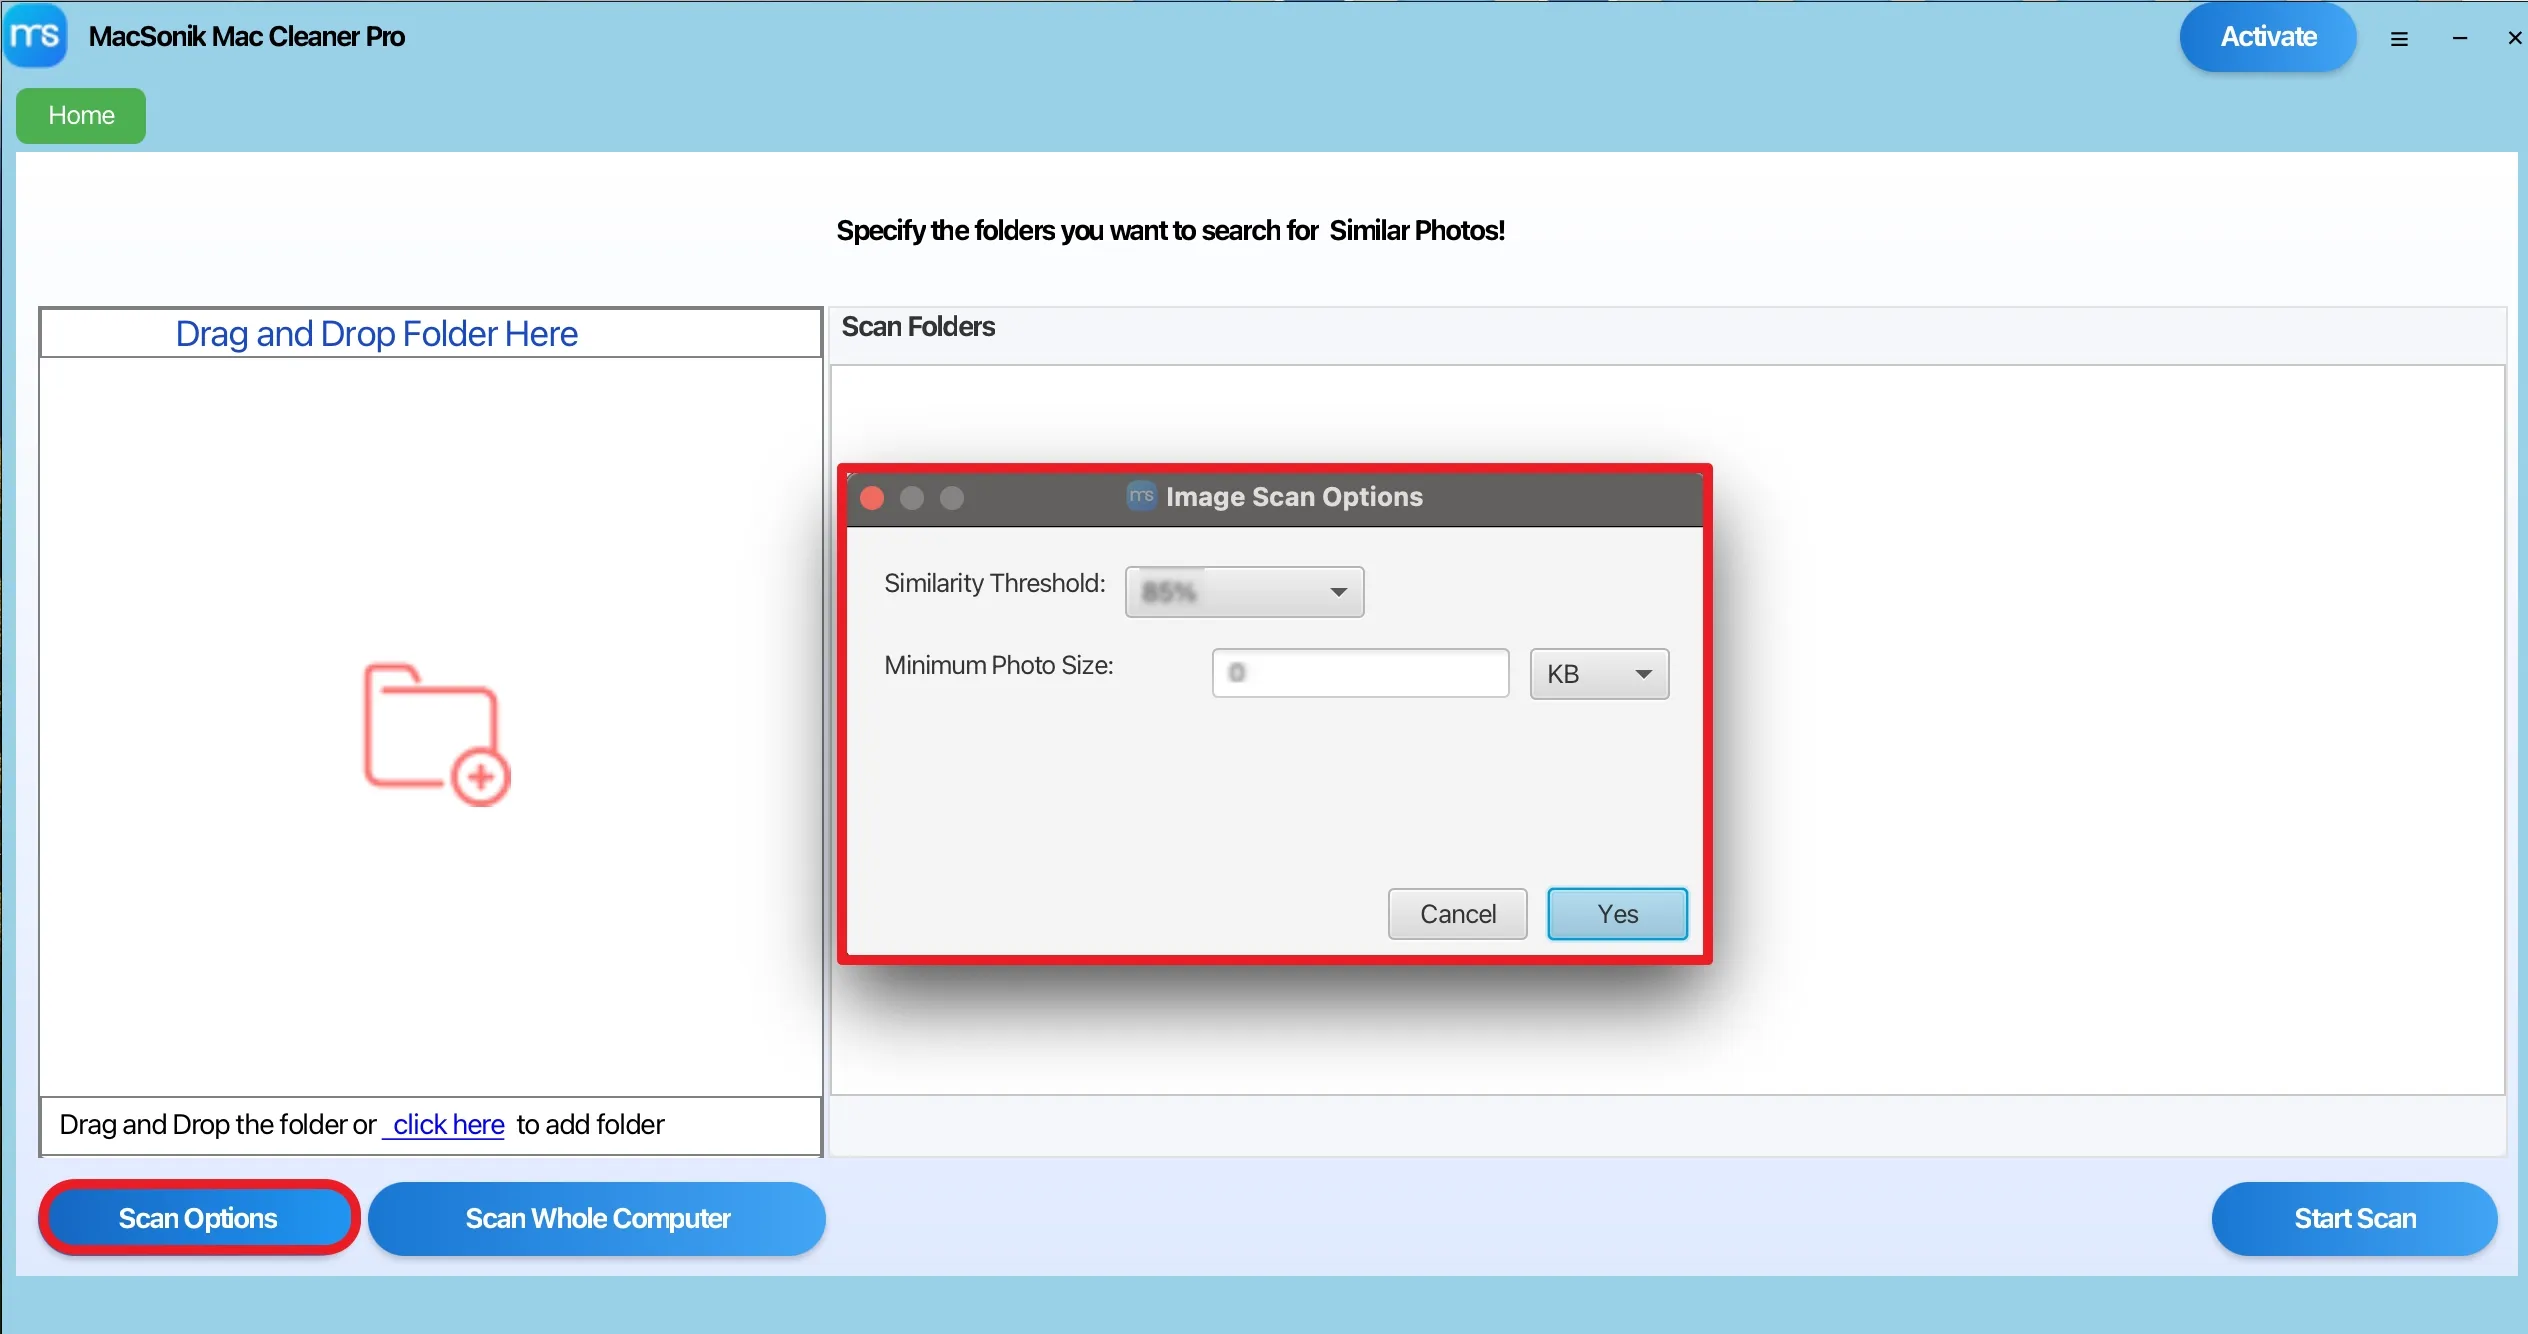
‘Scan Whole Computer’: Allows you to automatically select and search all available directories on your Mac for similar photos.
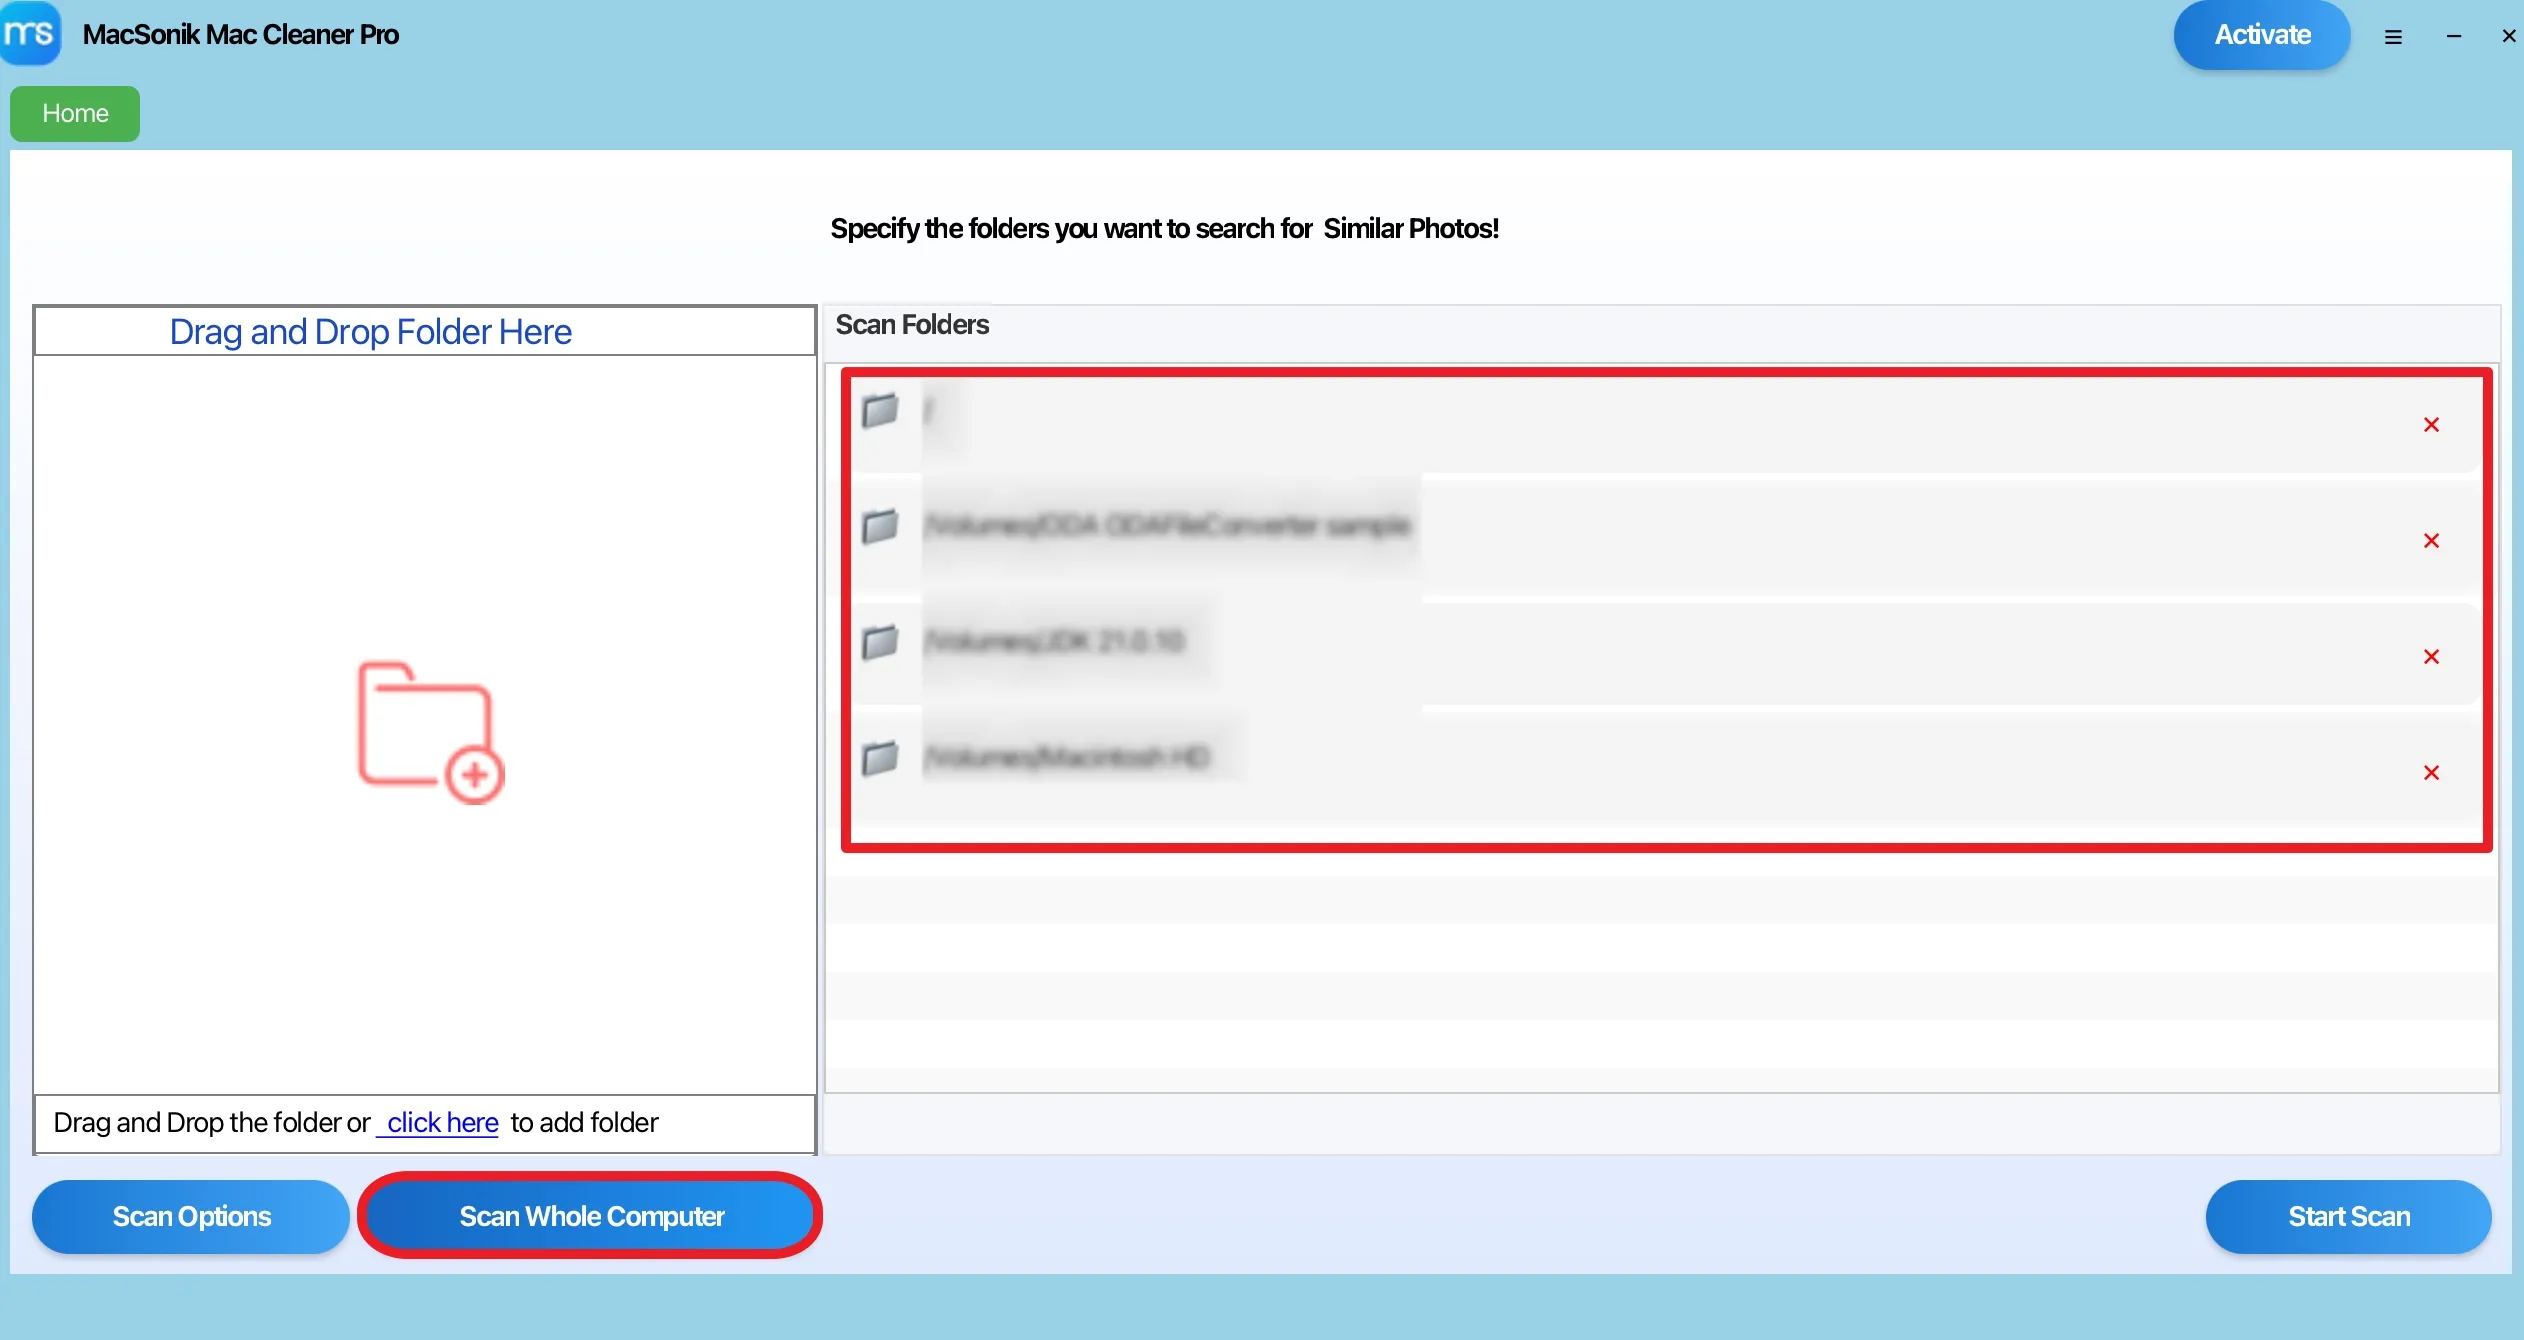
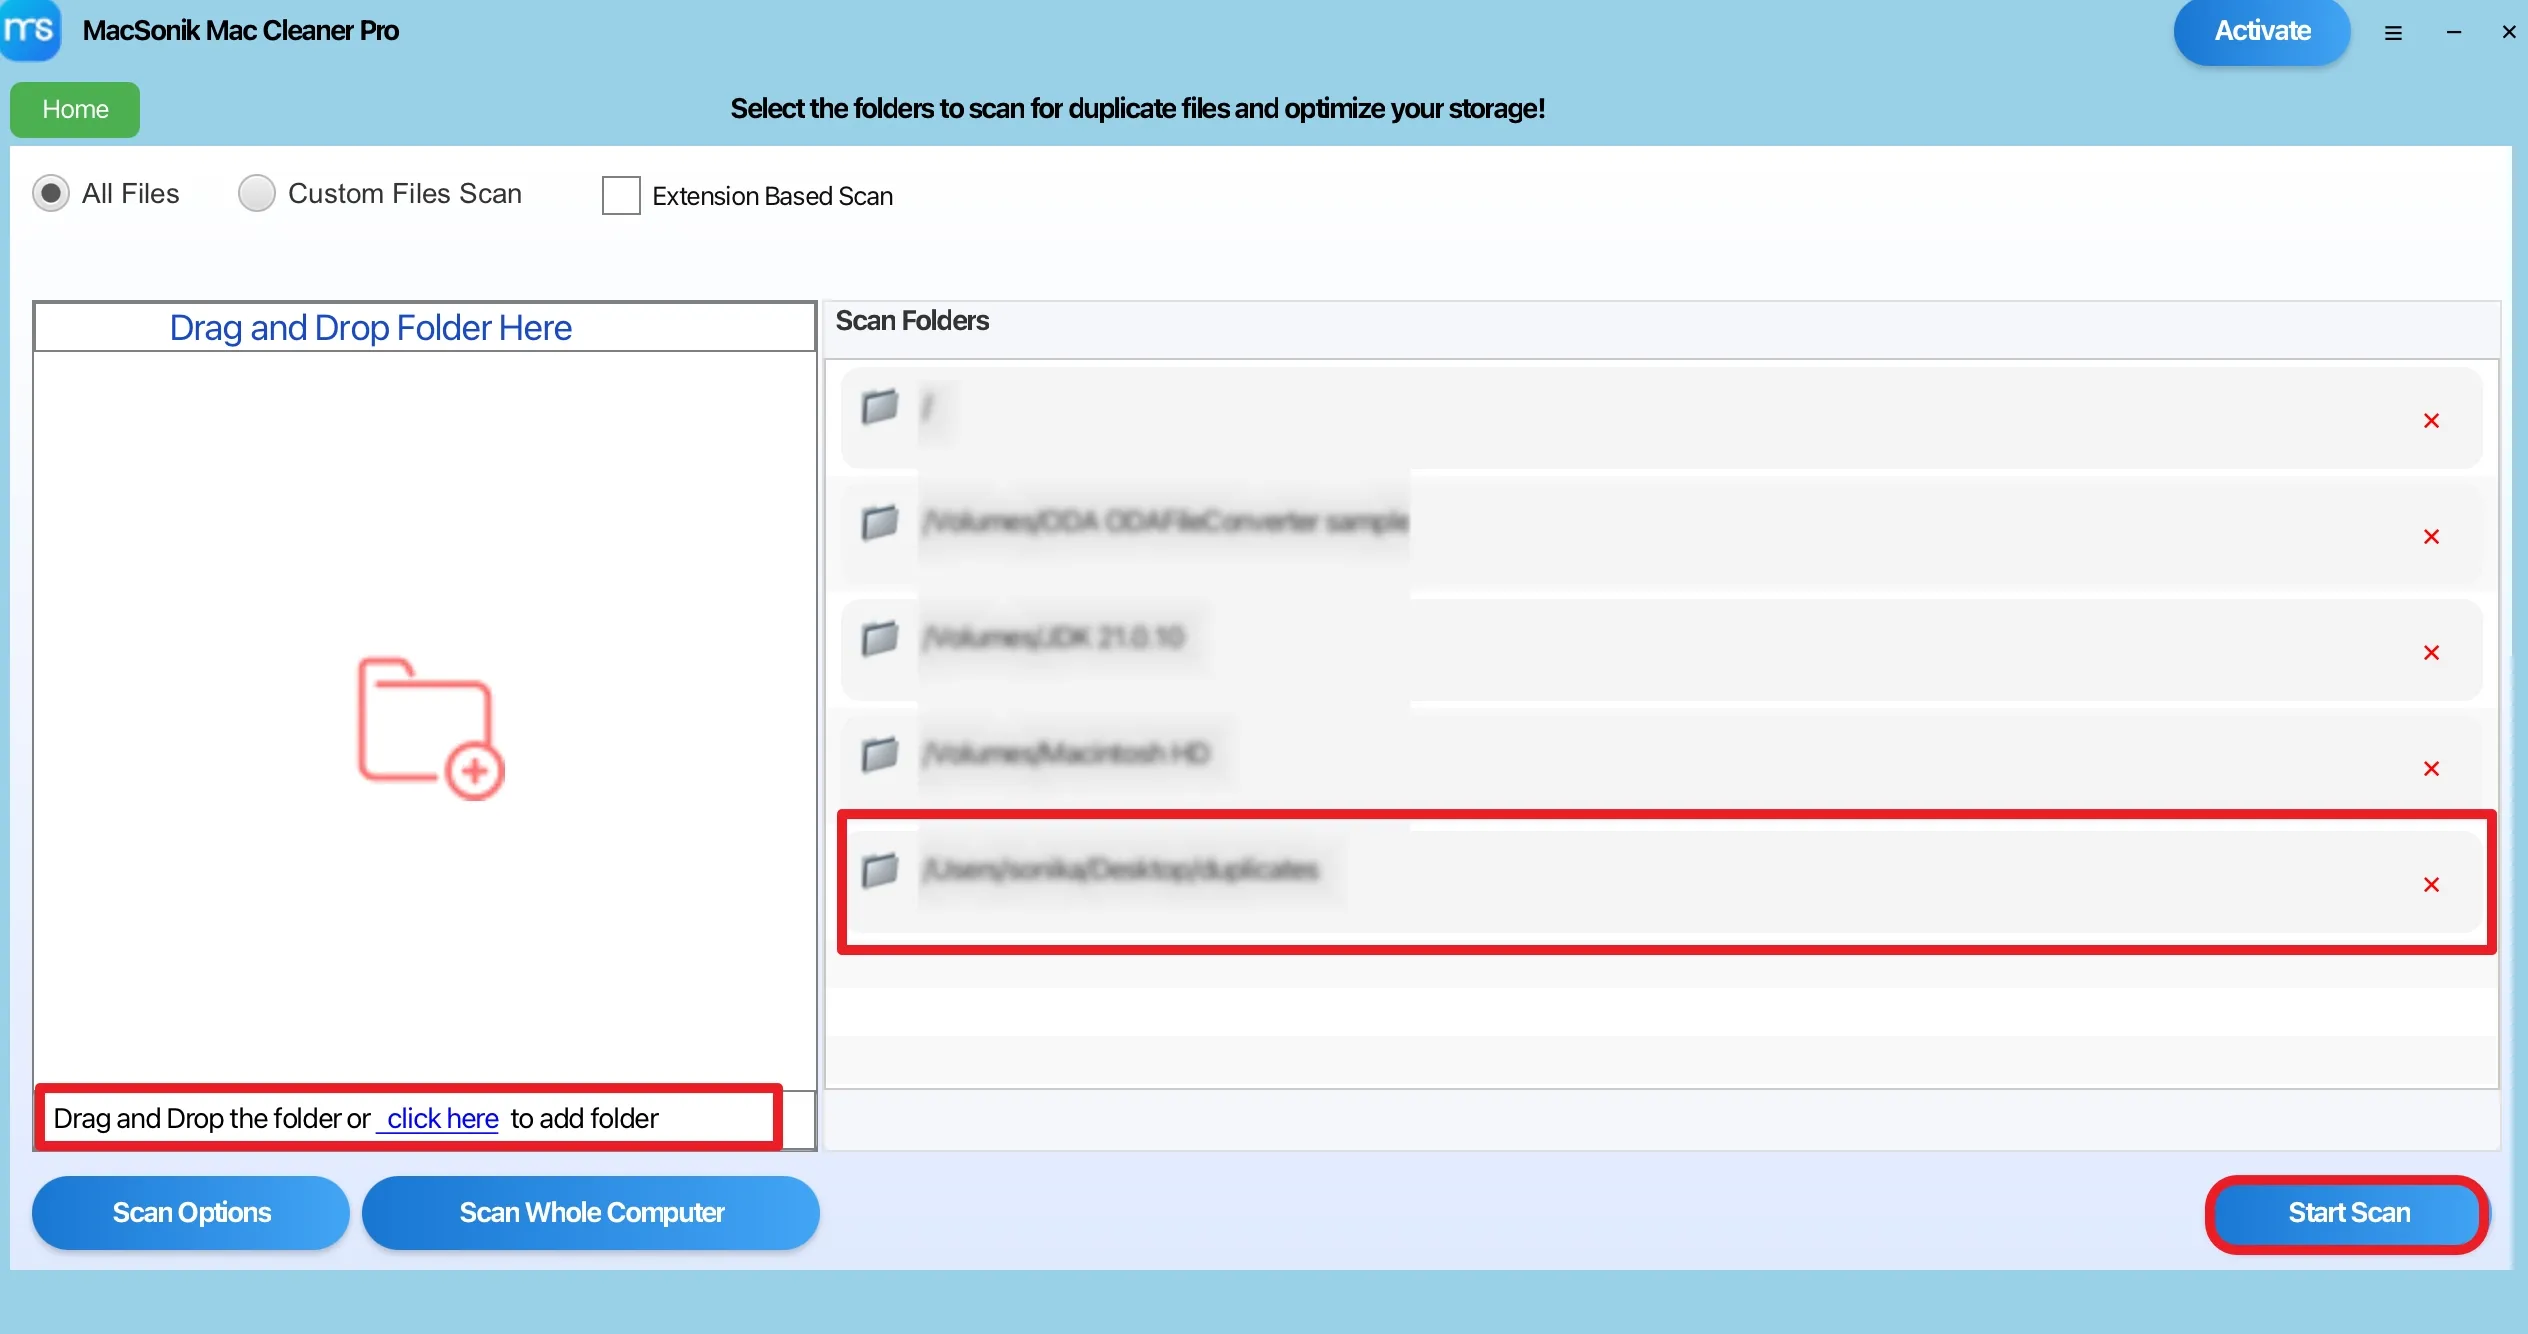
Now, use the ‘Drag & Drop’ option to add the folders of which duplicates you want to remove, and ‘Start Scan’.
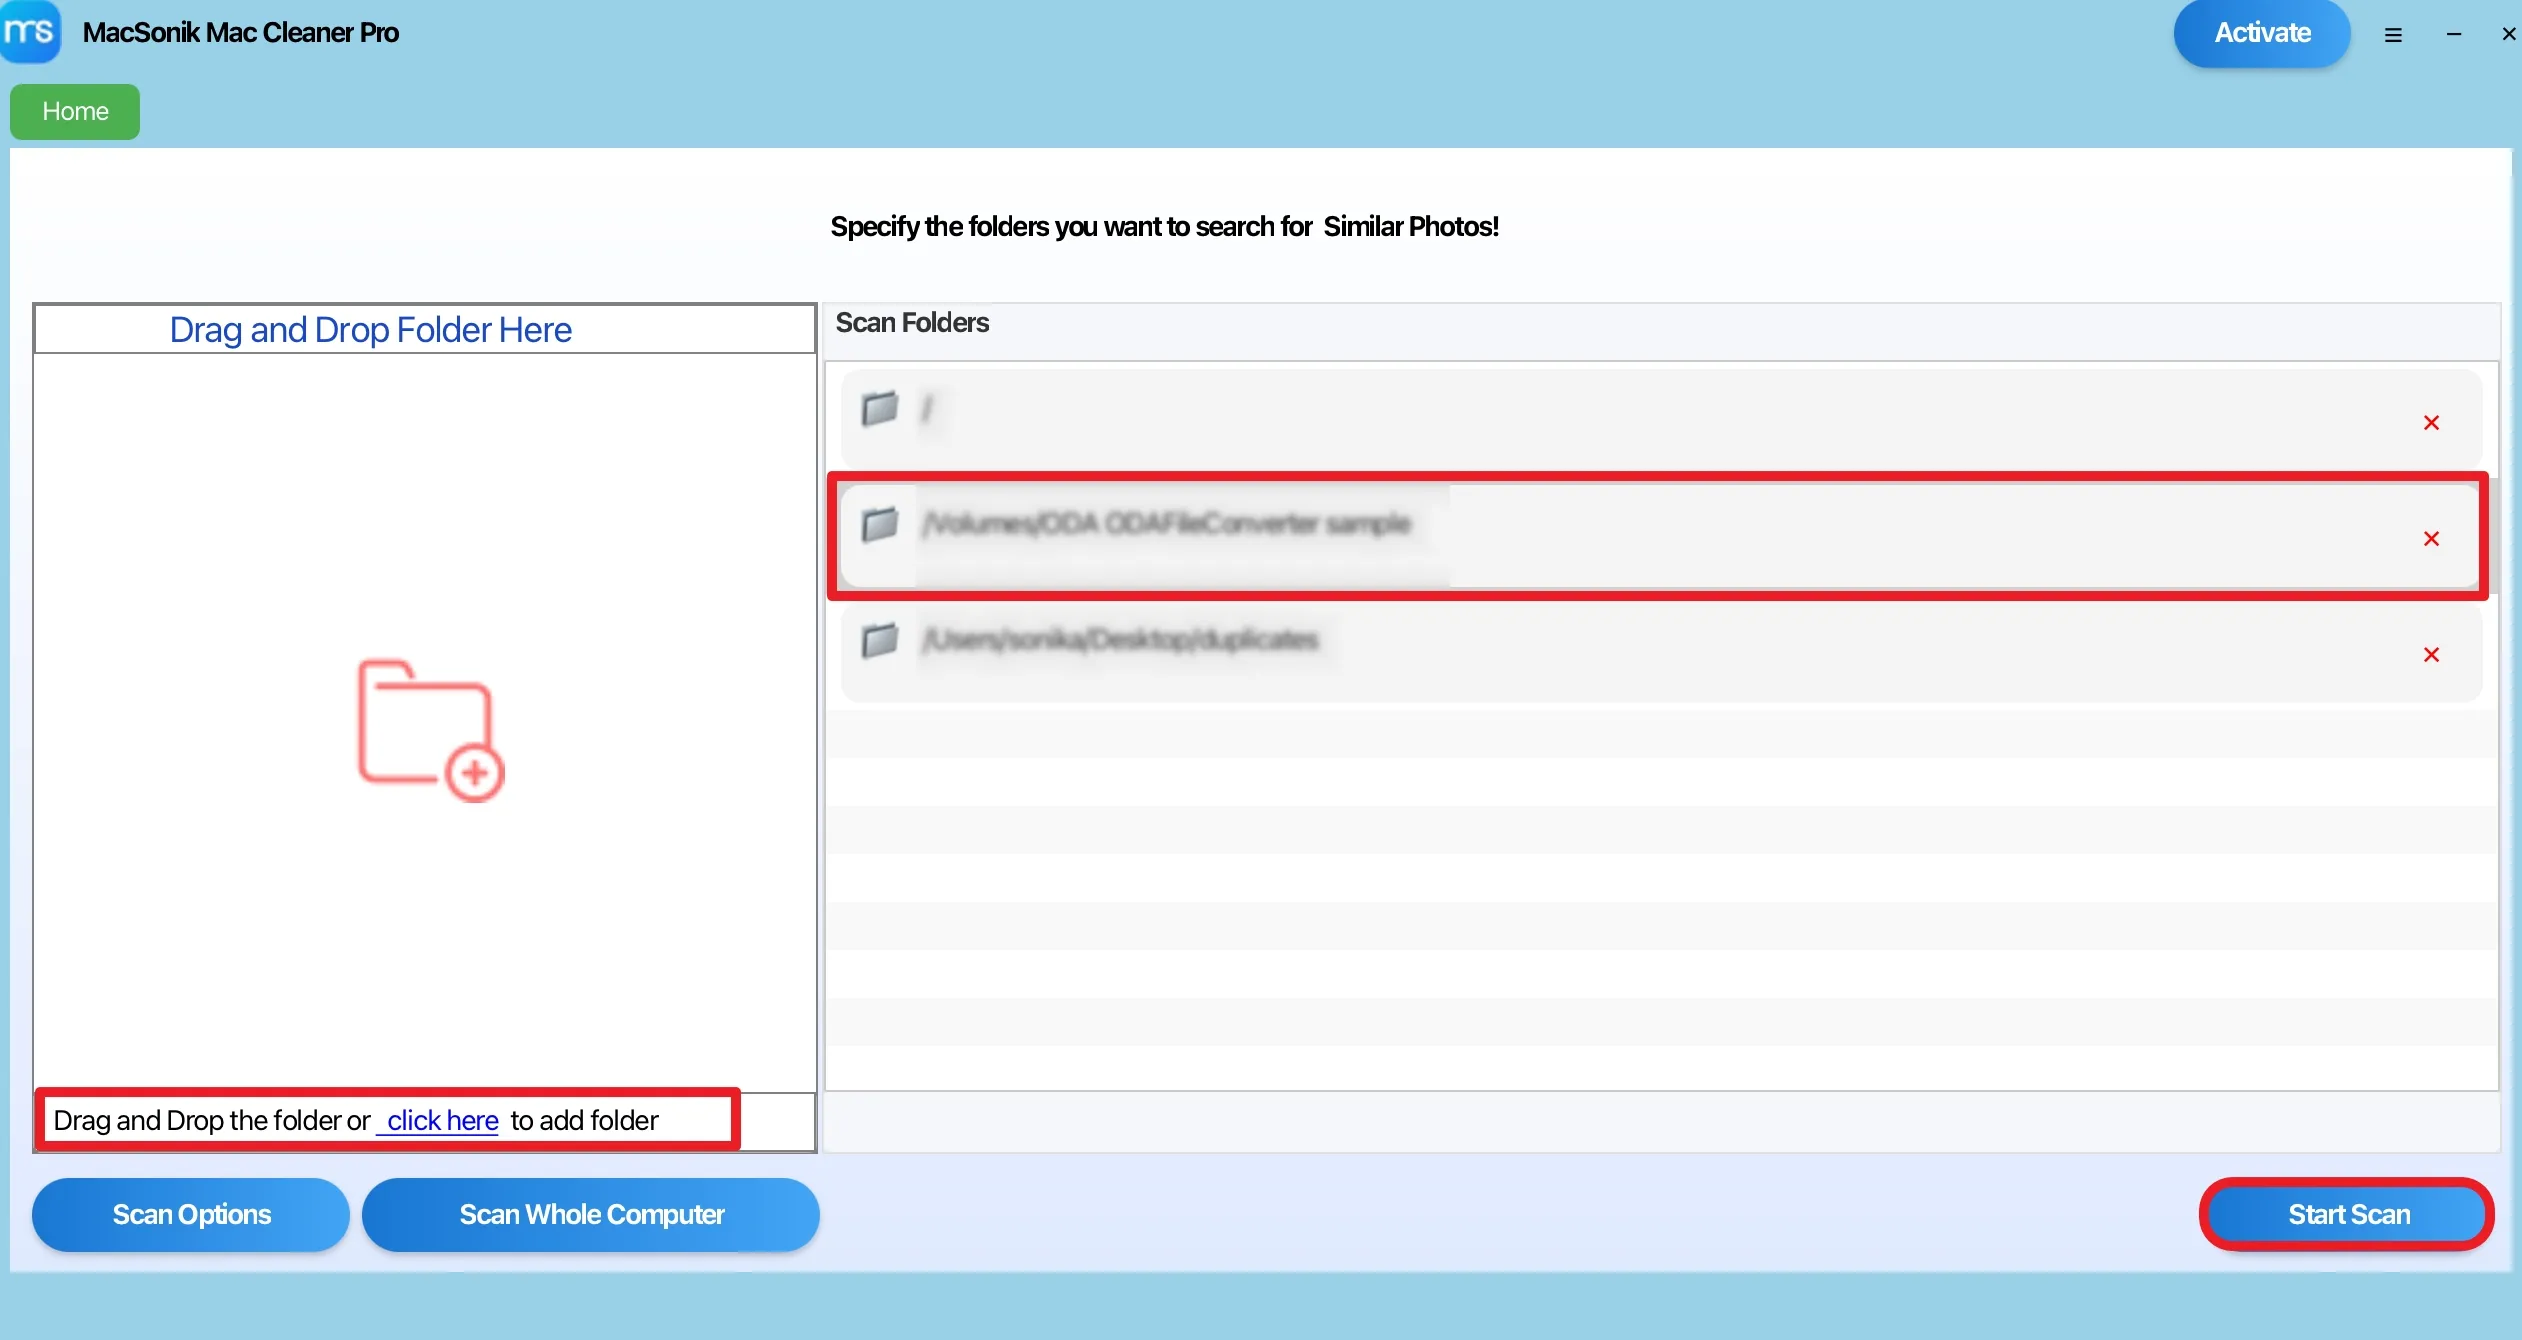
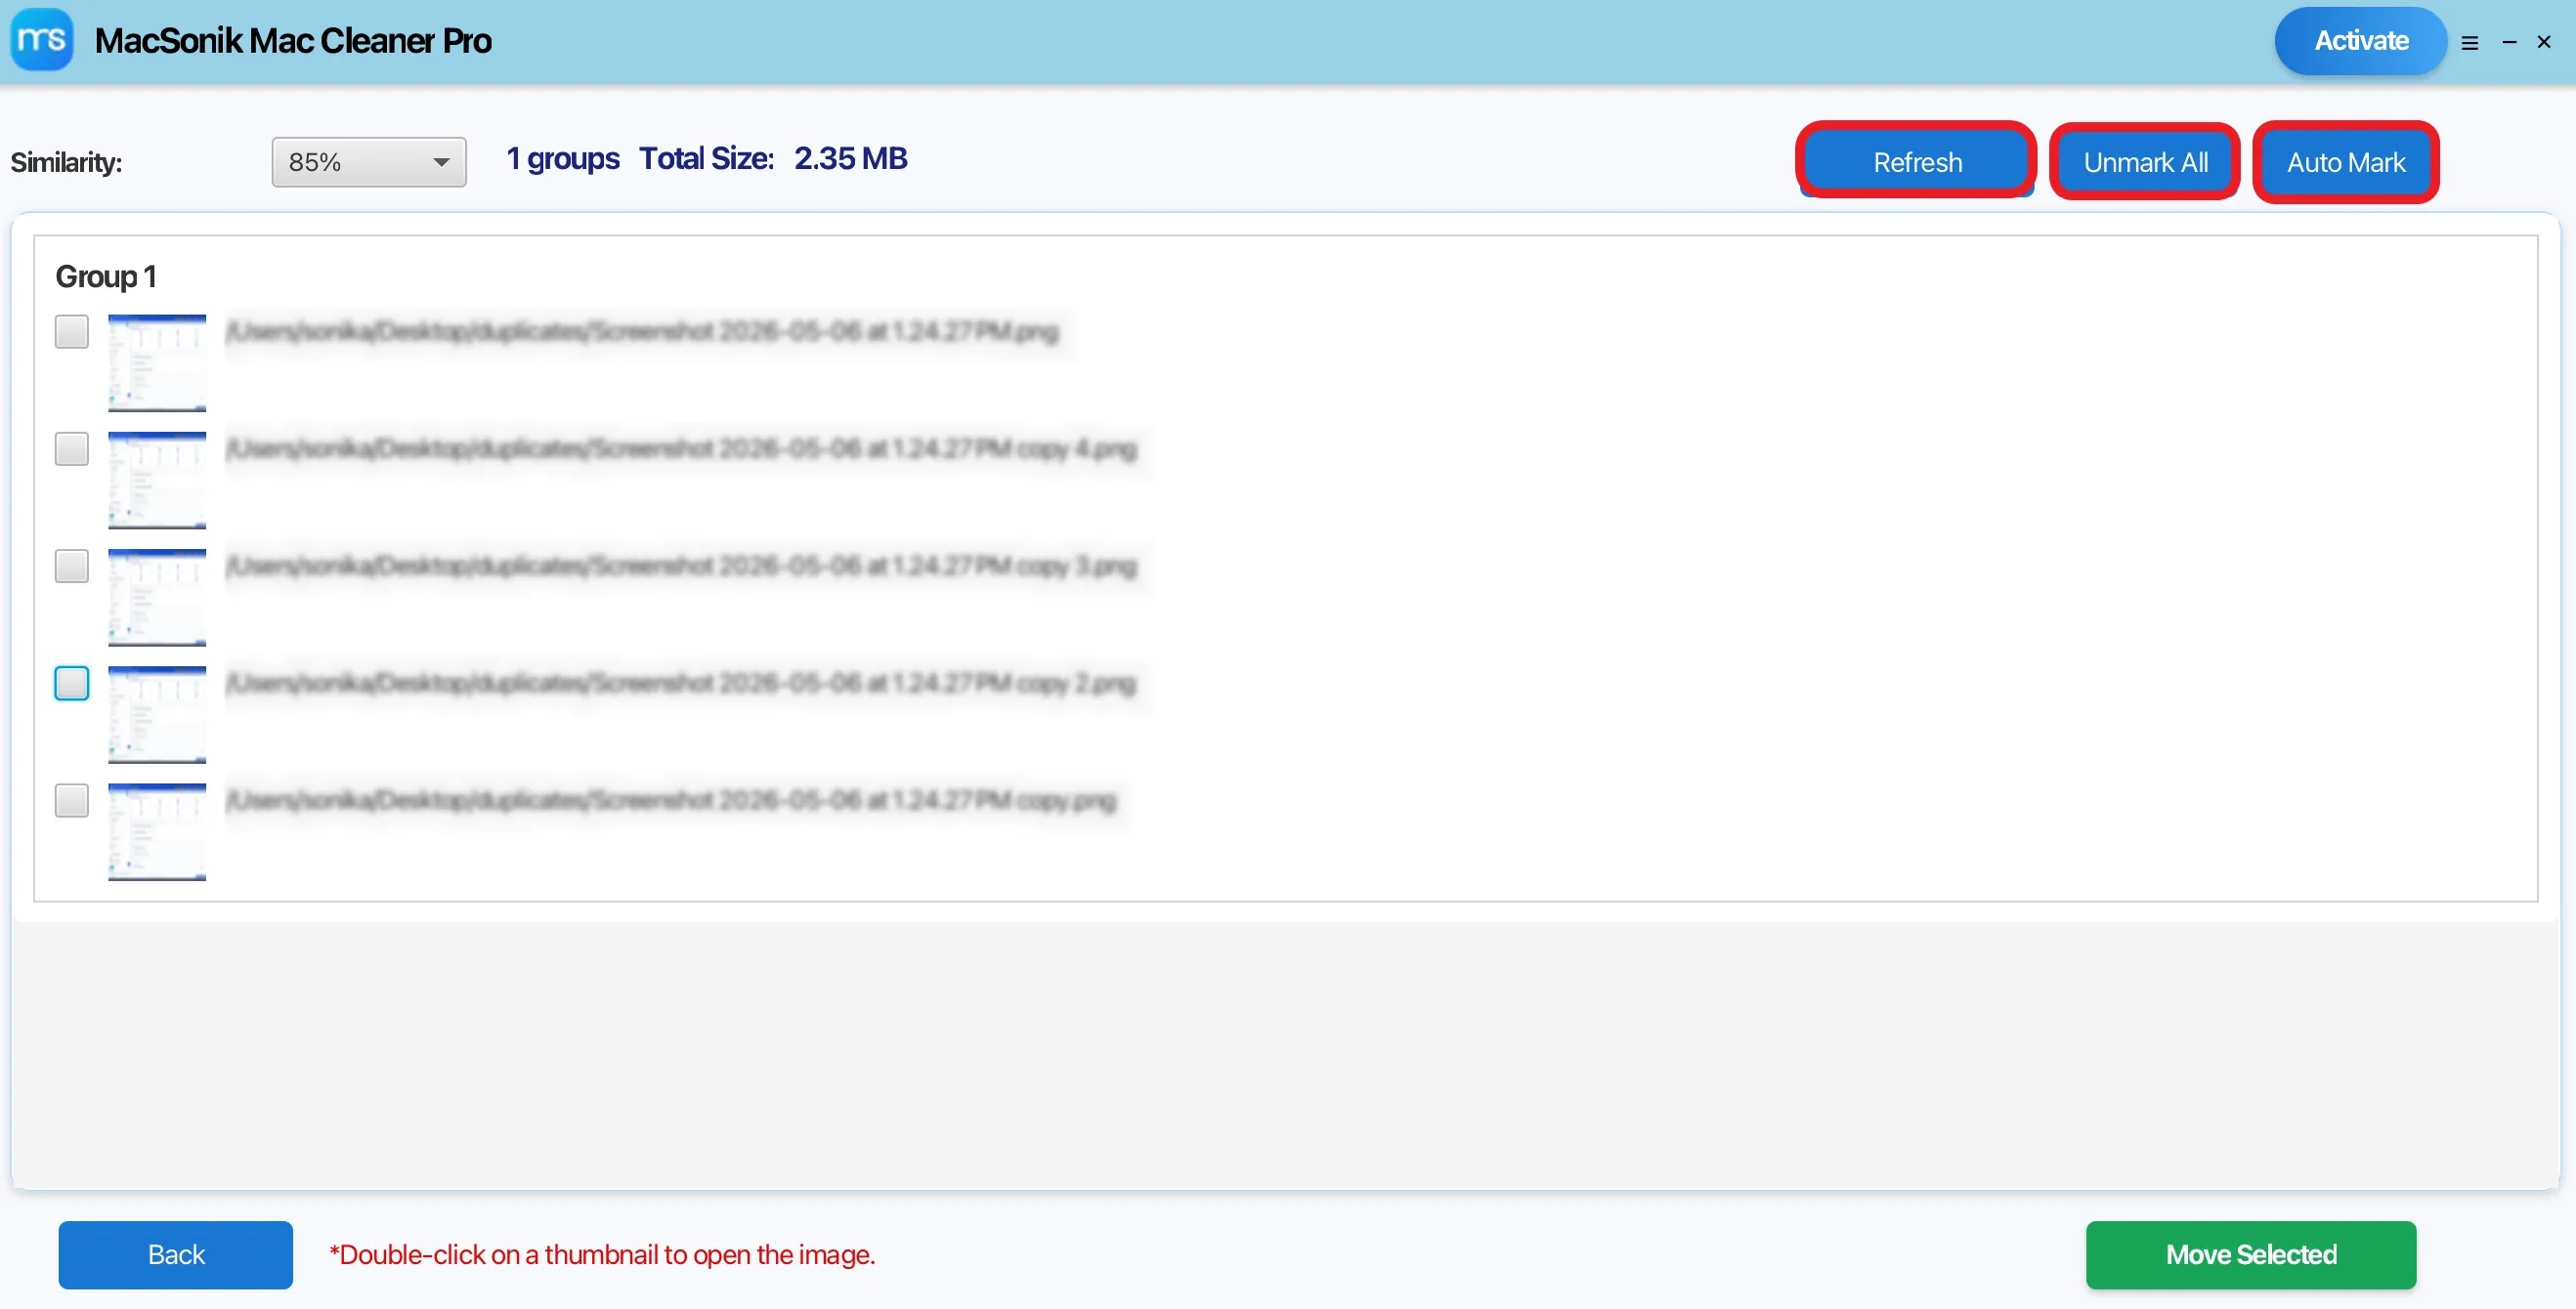
After that, select one among the following:
- ‘Refresh’: Updates the scan results list to reflect any recent changes made to the files or folders.
- ‘Unmark All’: Deselects all checked photos in the list to prevent them from being moved or deleted.
- ‘Auto Mark’: Automatically selects duplicate copies within identified groups, leaving one original file unmarked for safekeeping.
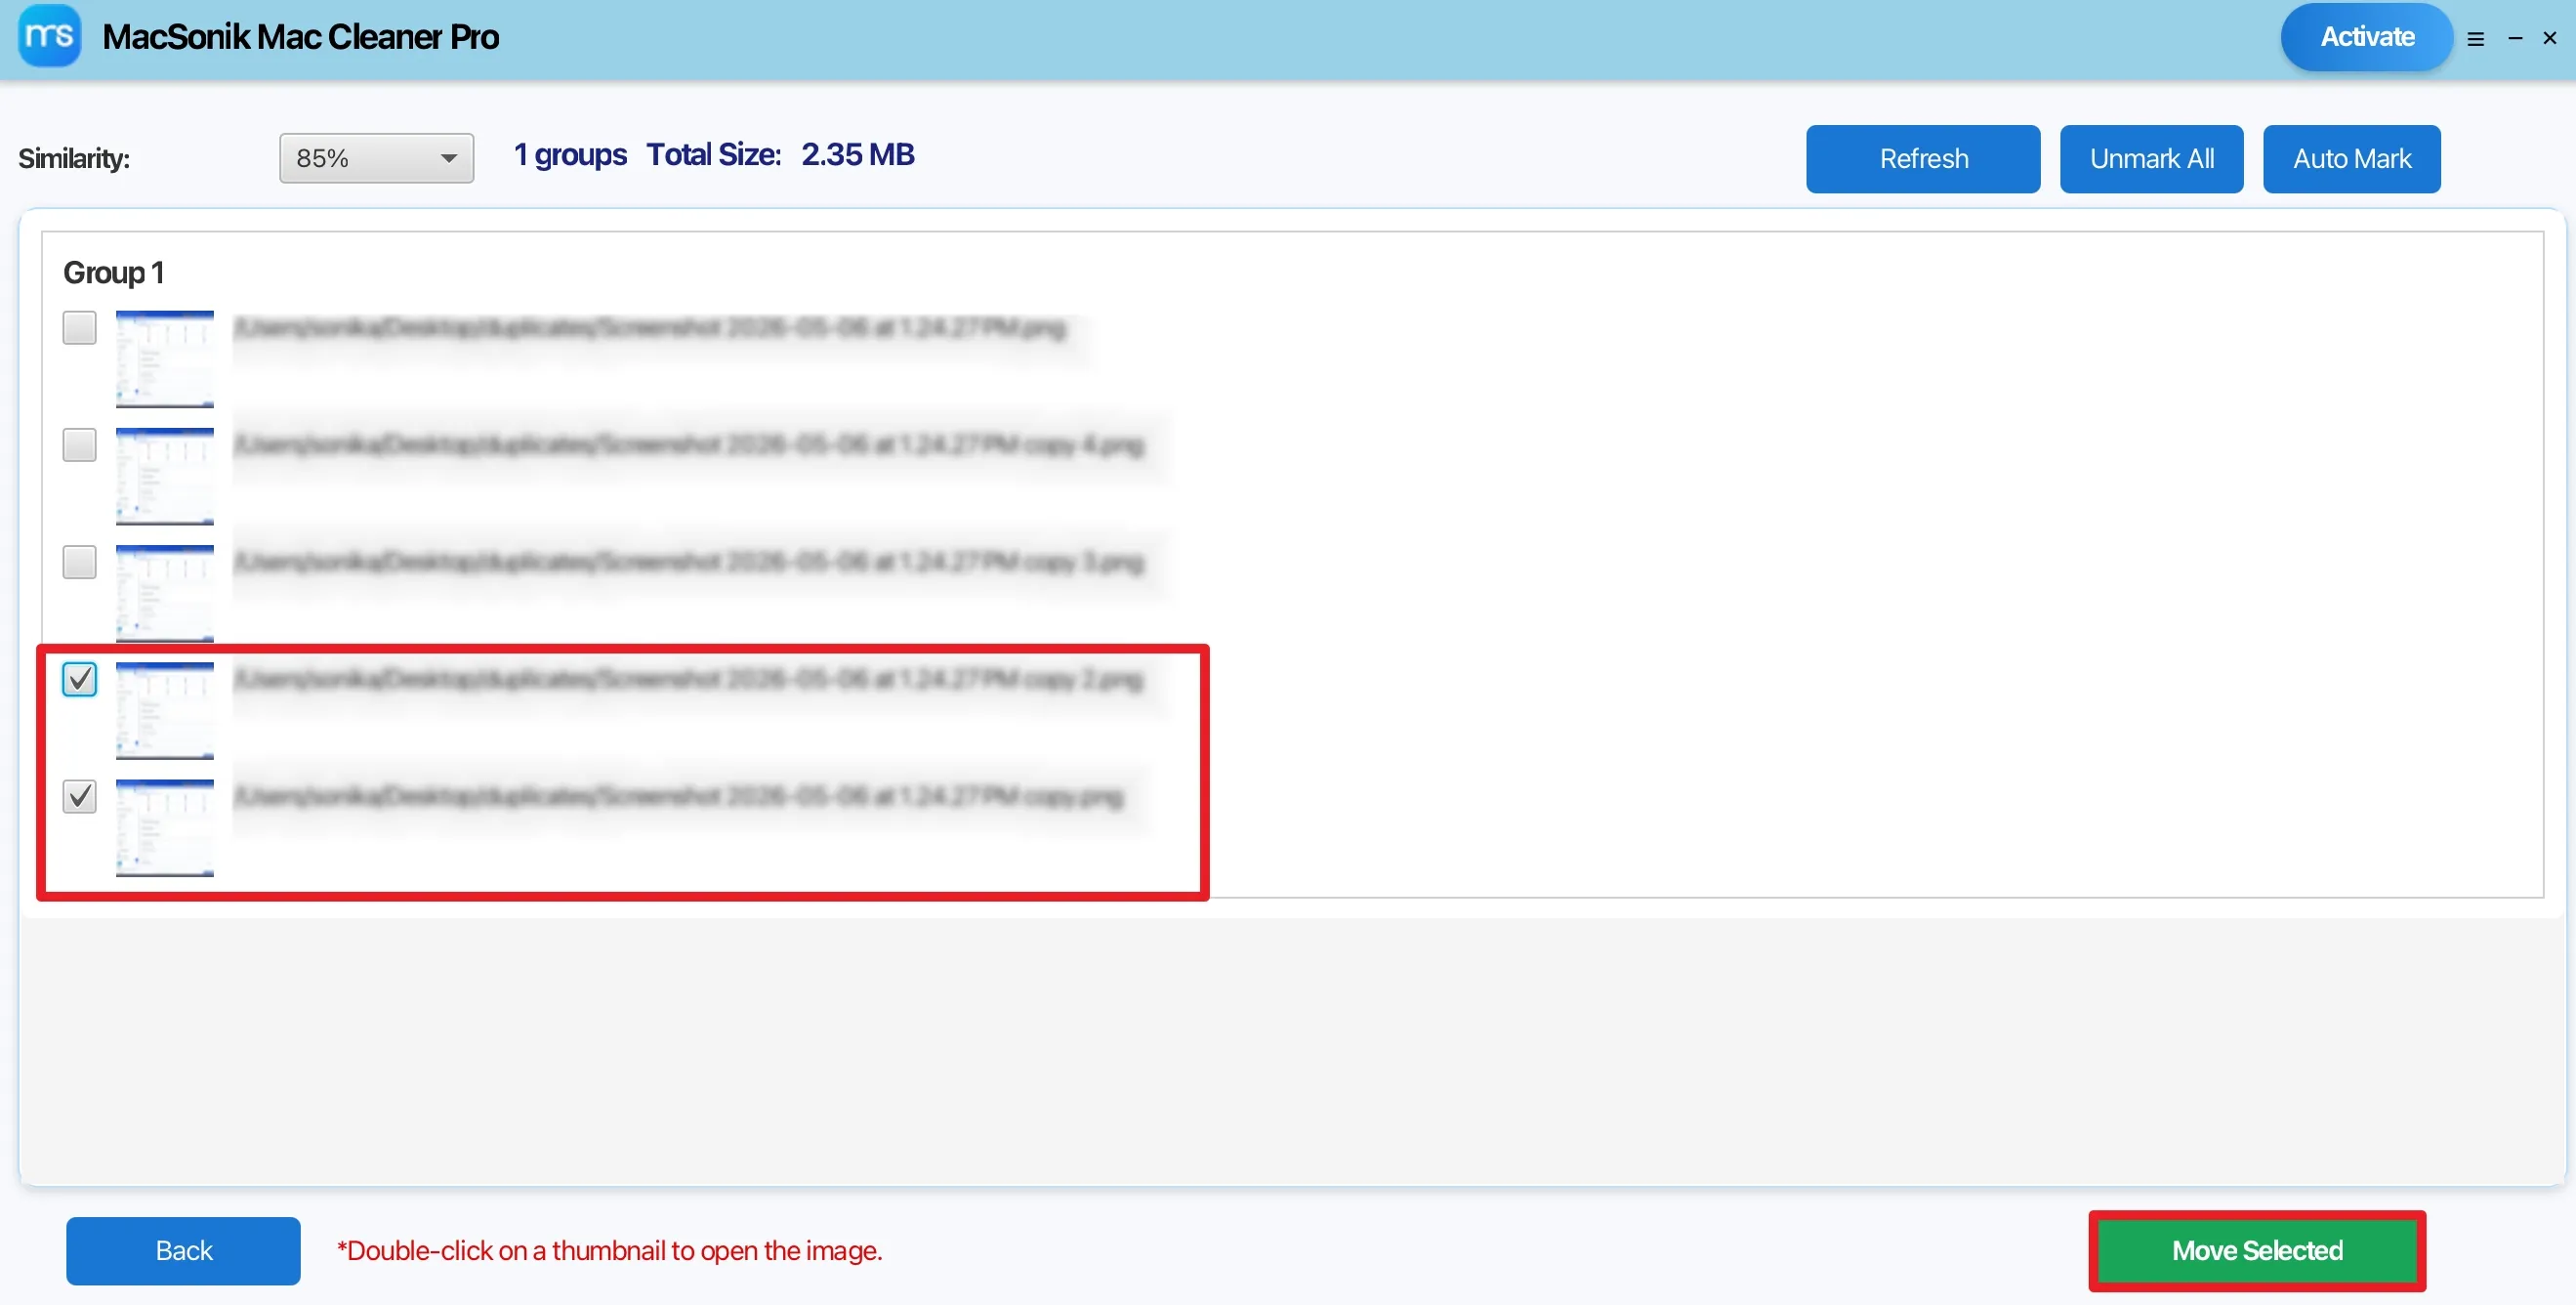
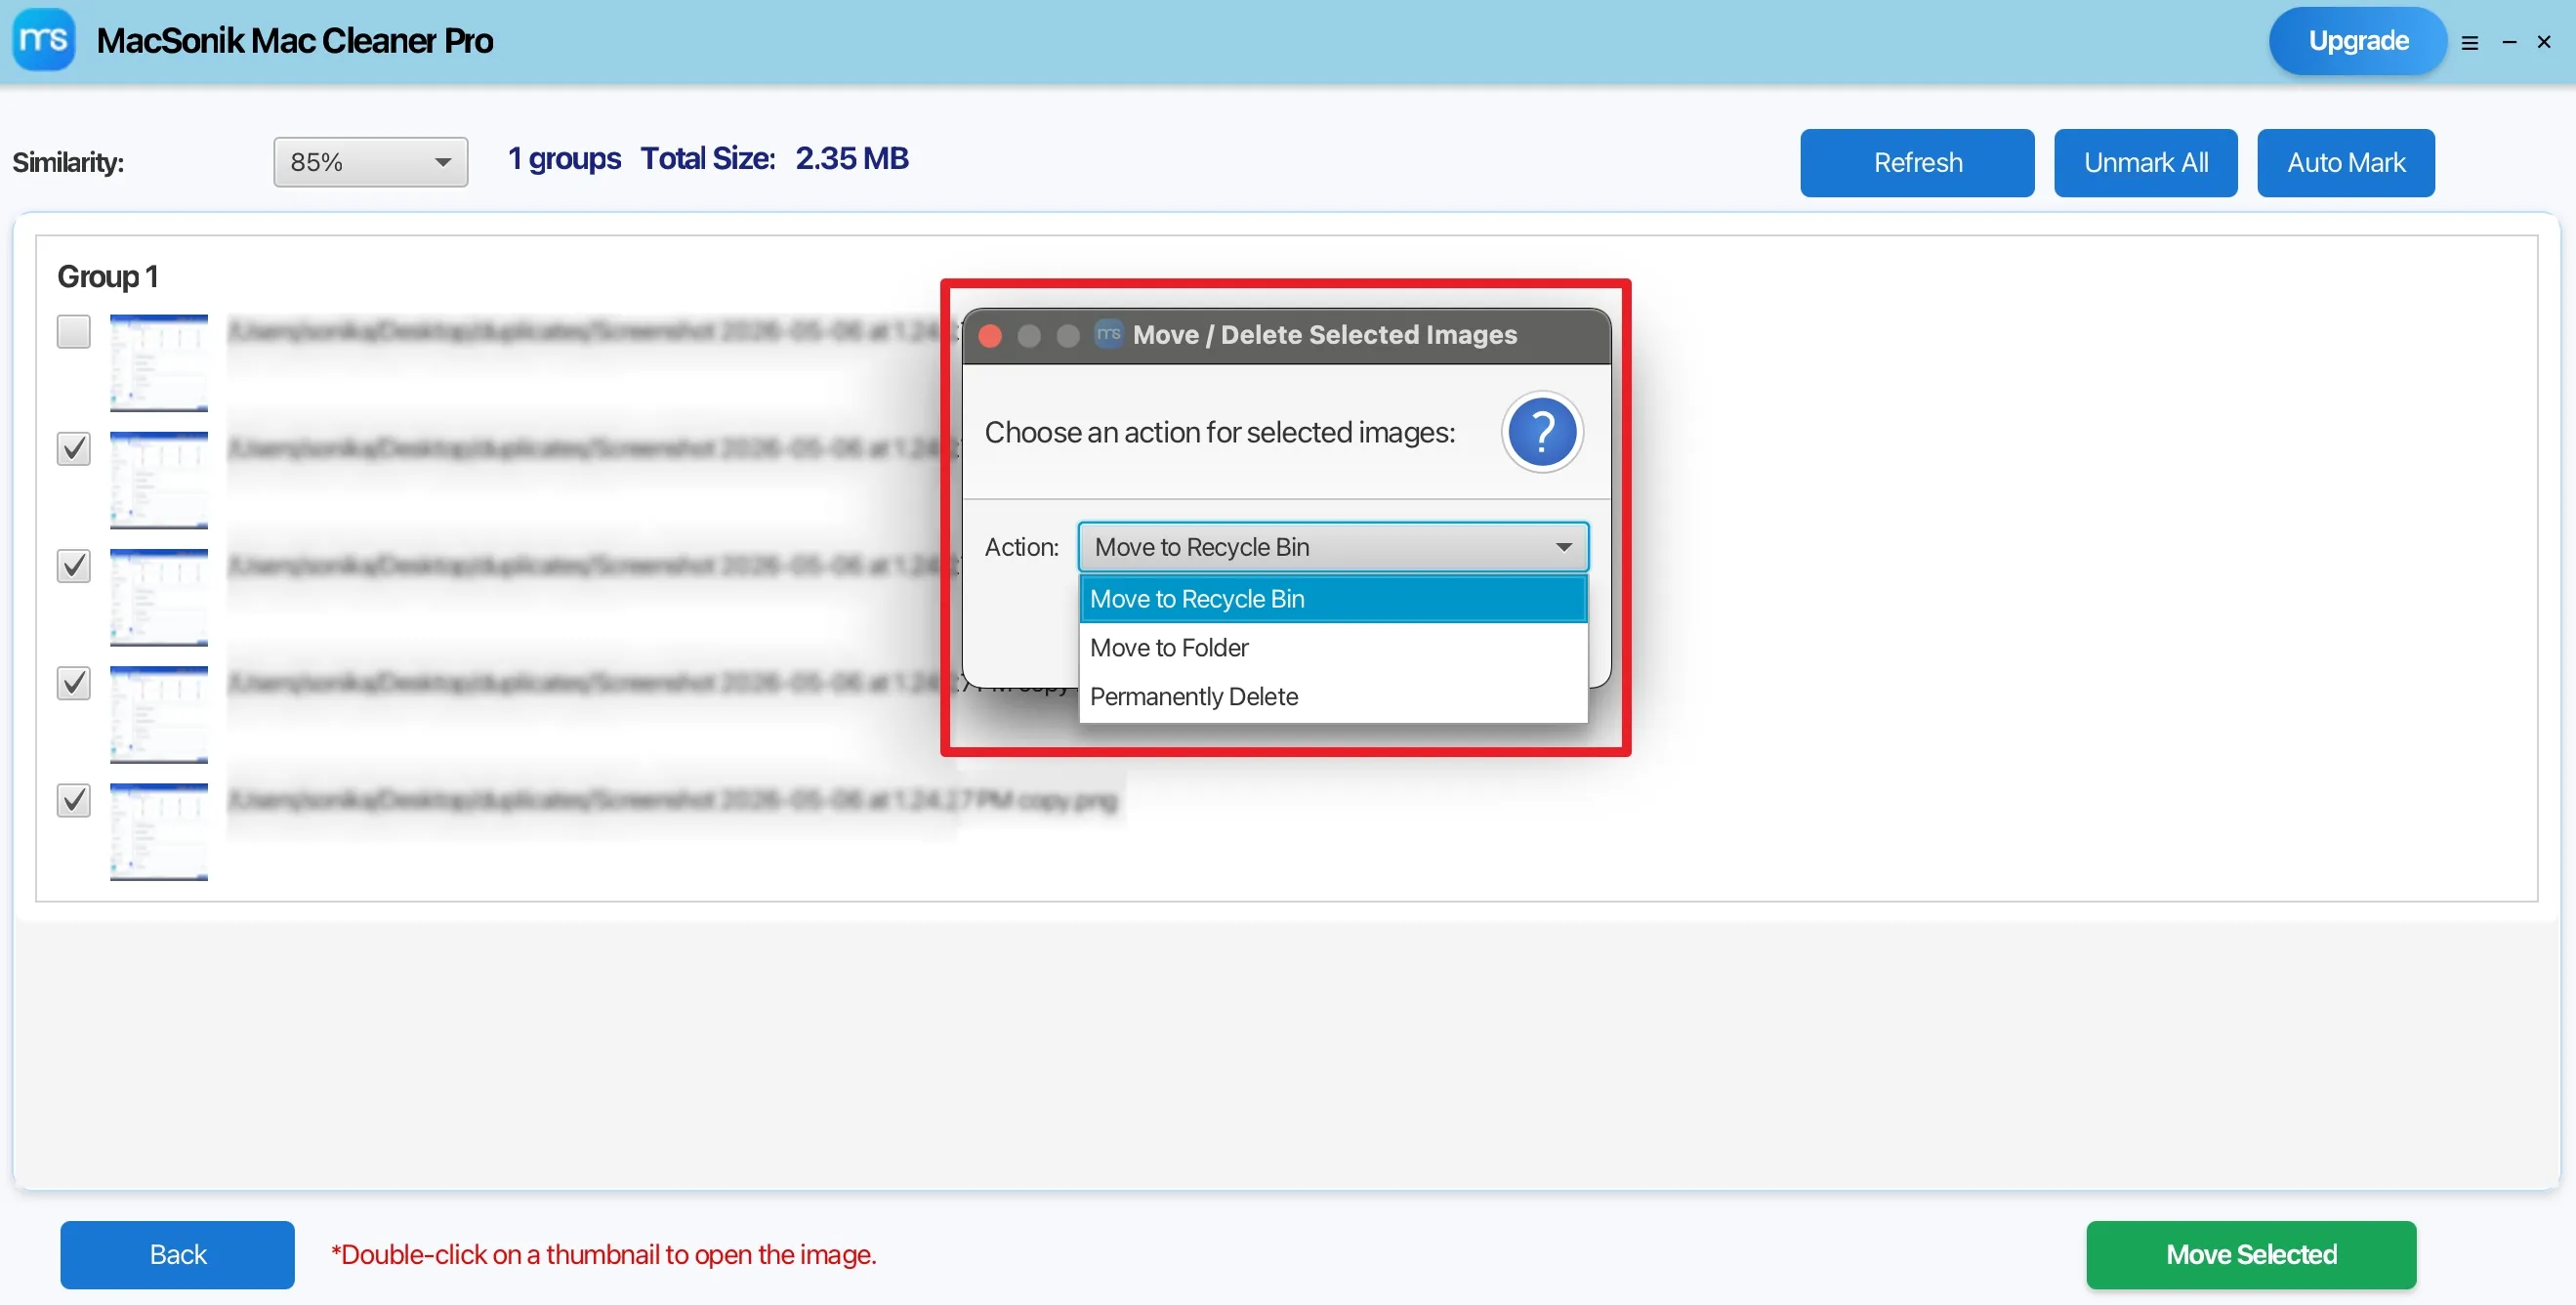
Process to Remove Duplicate Files/Documents
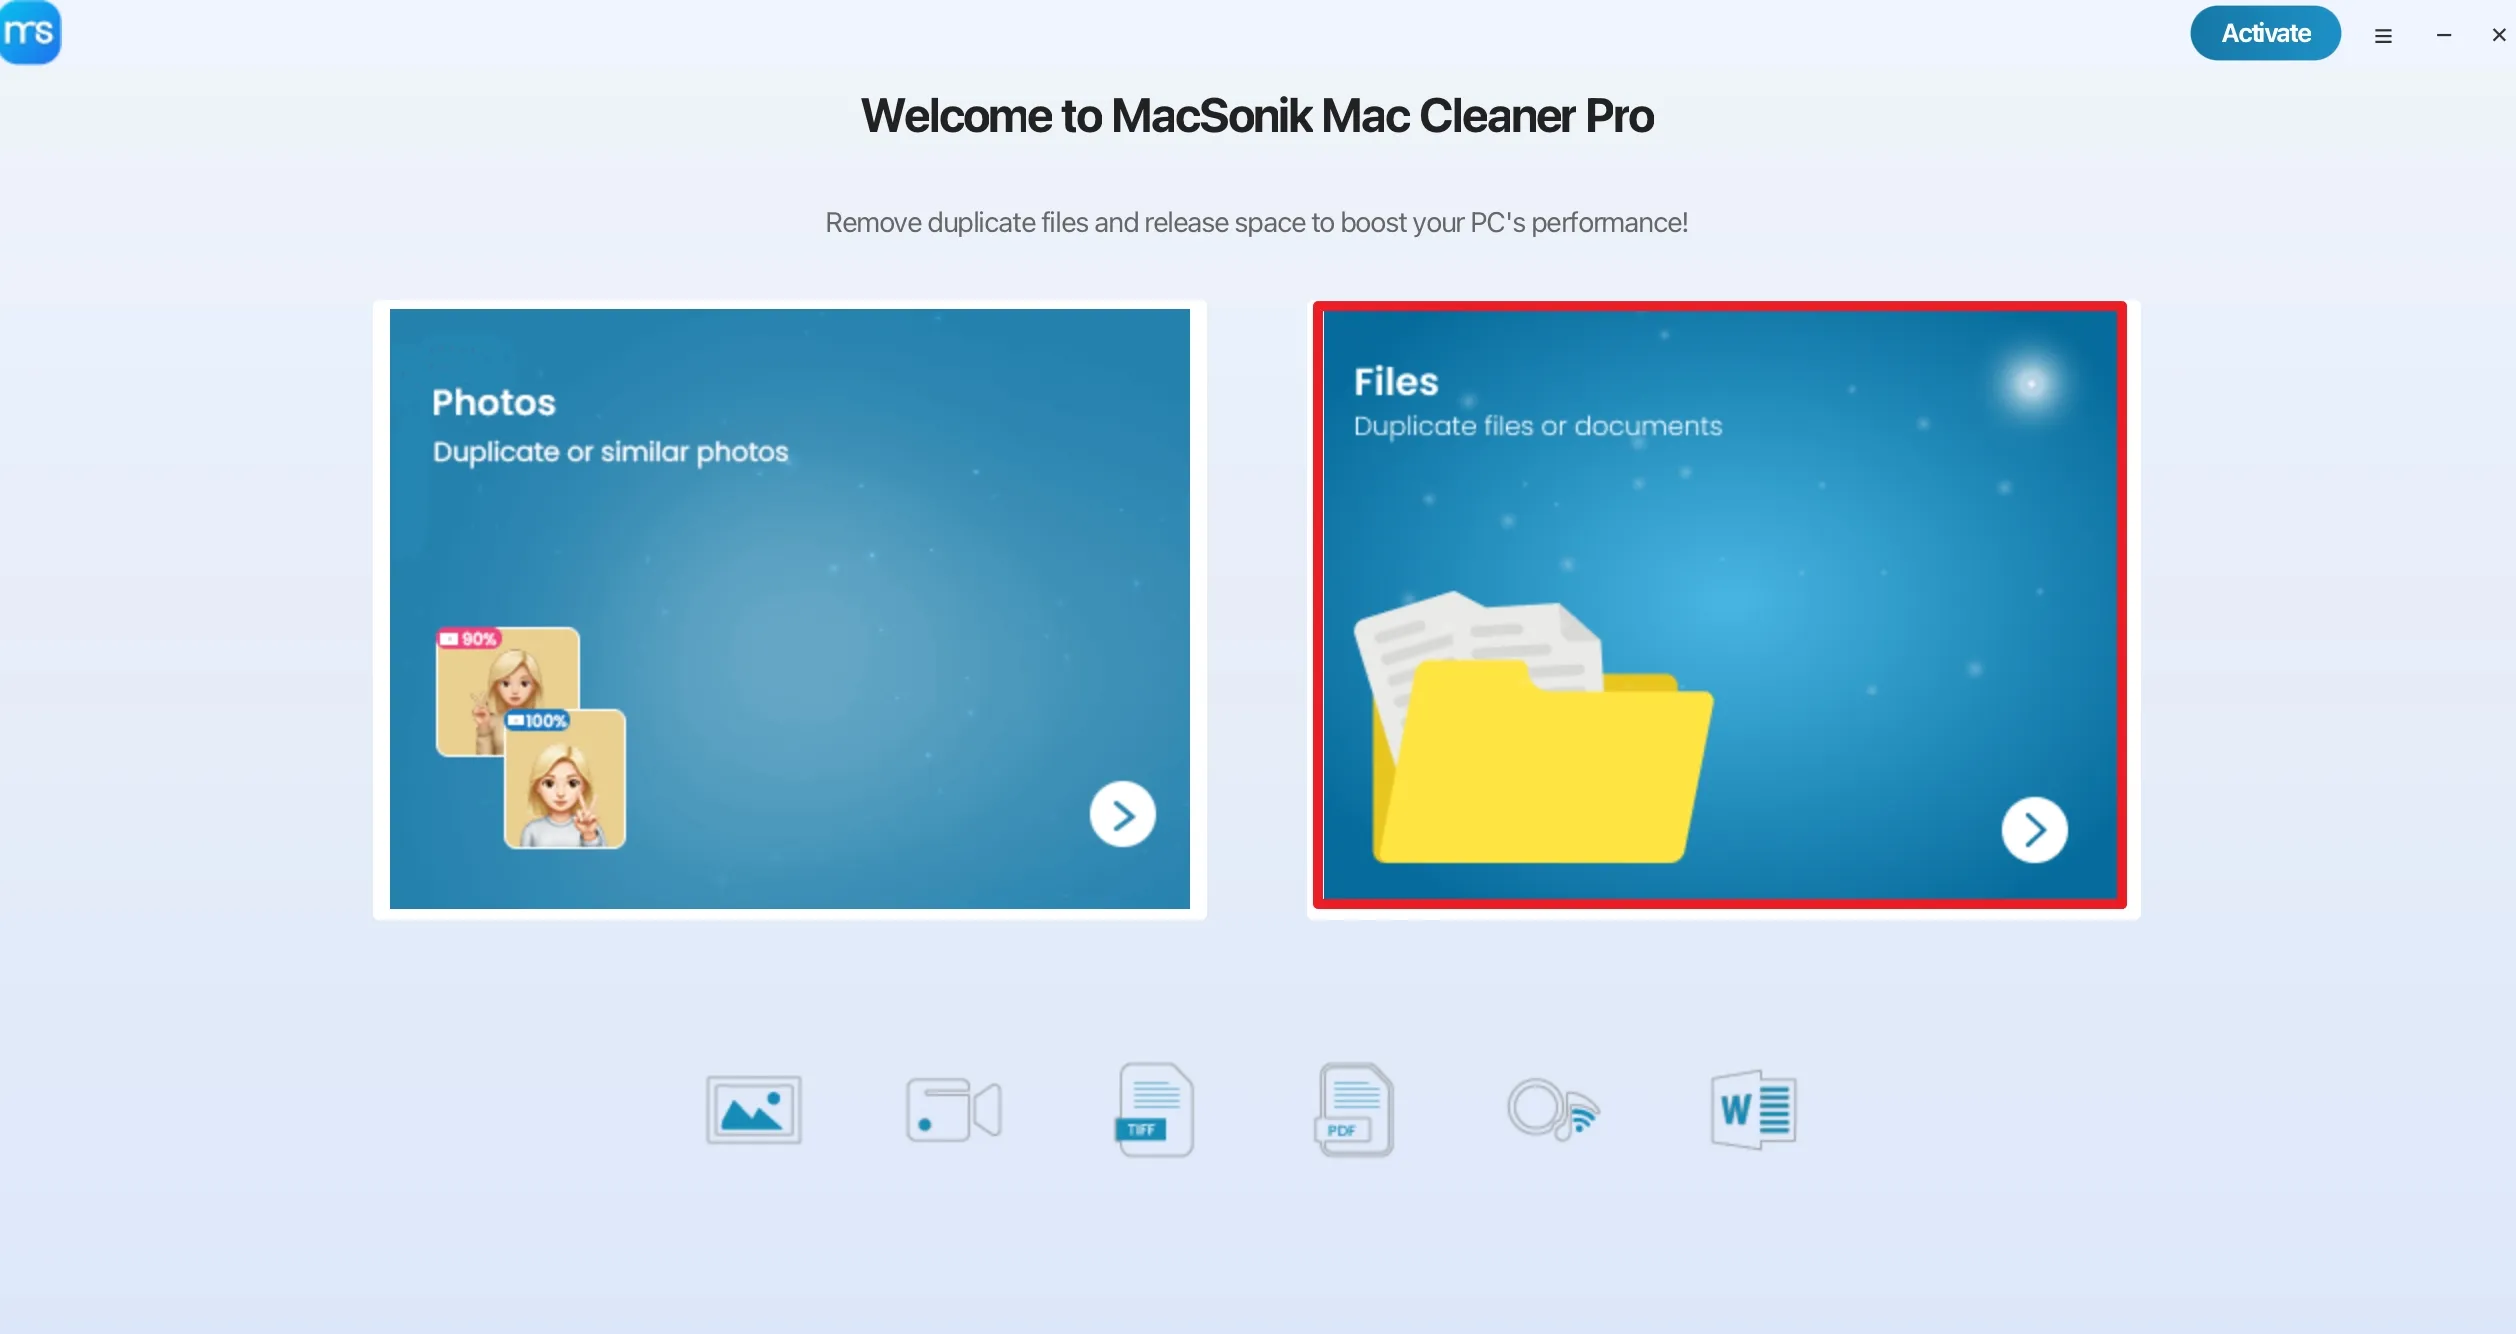
Now, choose one among the following according to your requirement:
- ‘All Files’: Selects every file type within the chosen folders for a comprehensive search for any duplicates.
- ‘Custom Files Scan’: Allows you to filter your search by specific categories like Documents, Videos, Music, Images, or Archives to target specific data types.
- ‘Extension-Based Scan’: Enables a specialized search based on specific file formats or extensions to find duplicates within a narrow technical scope.
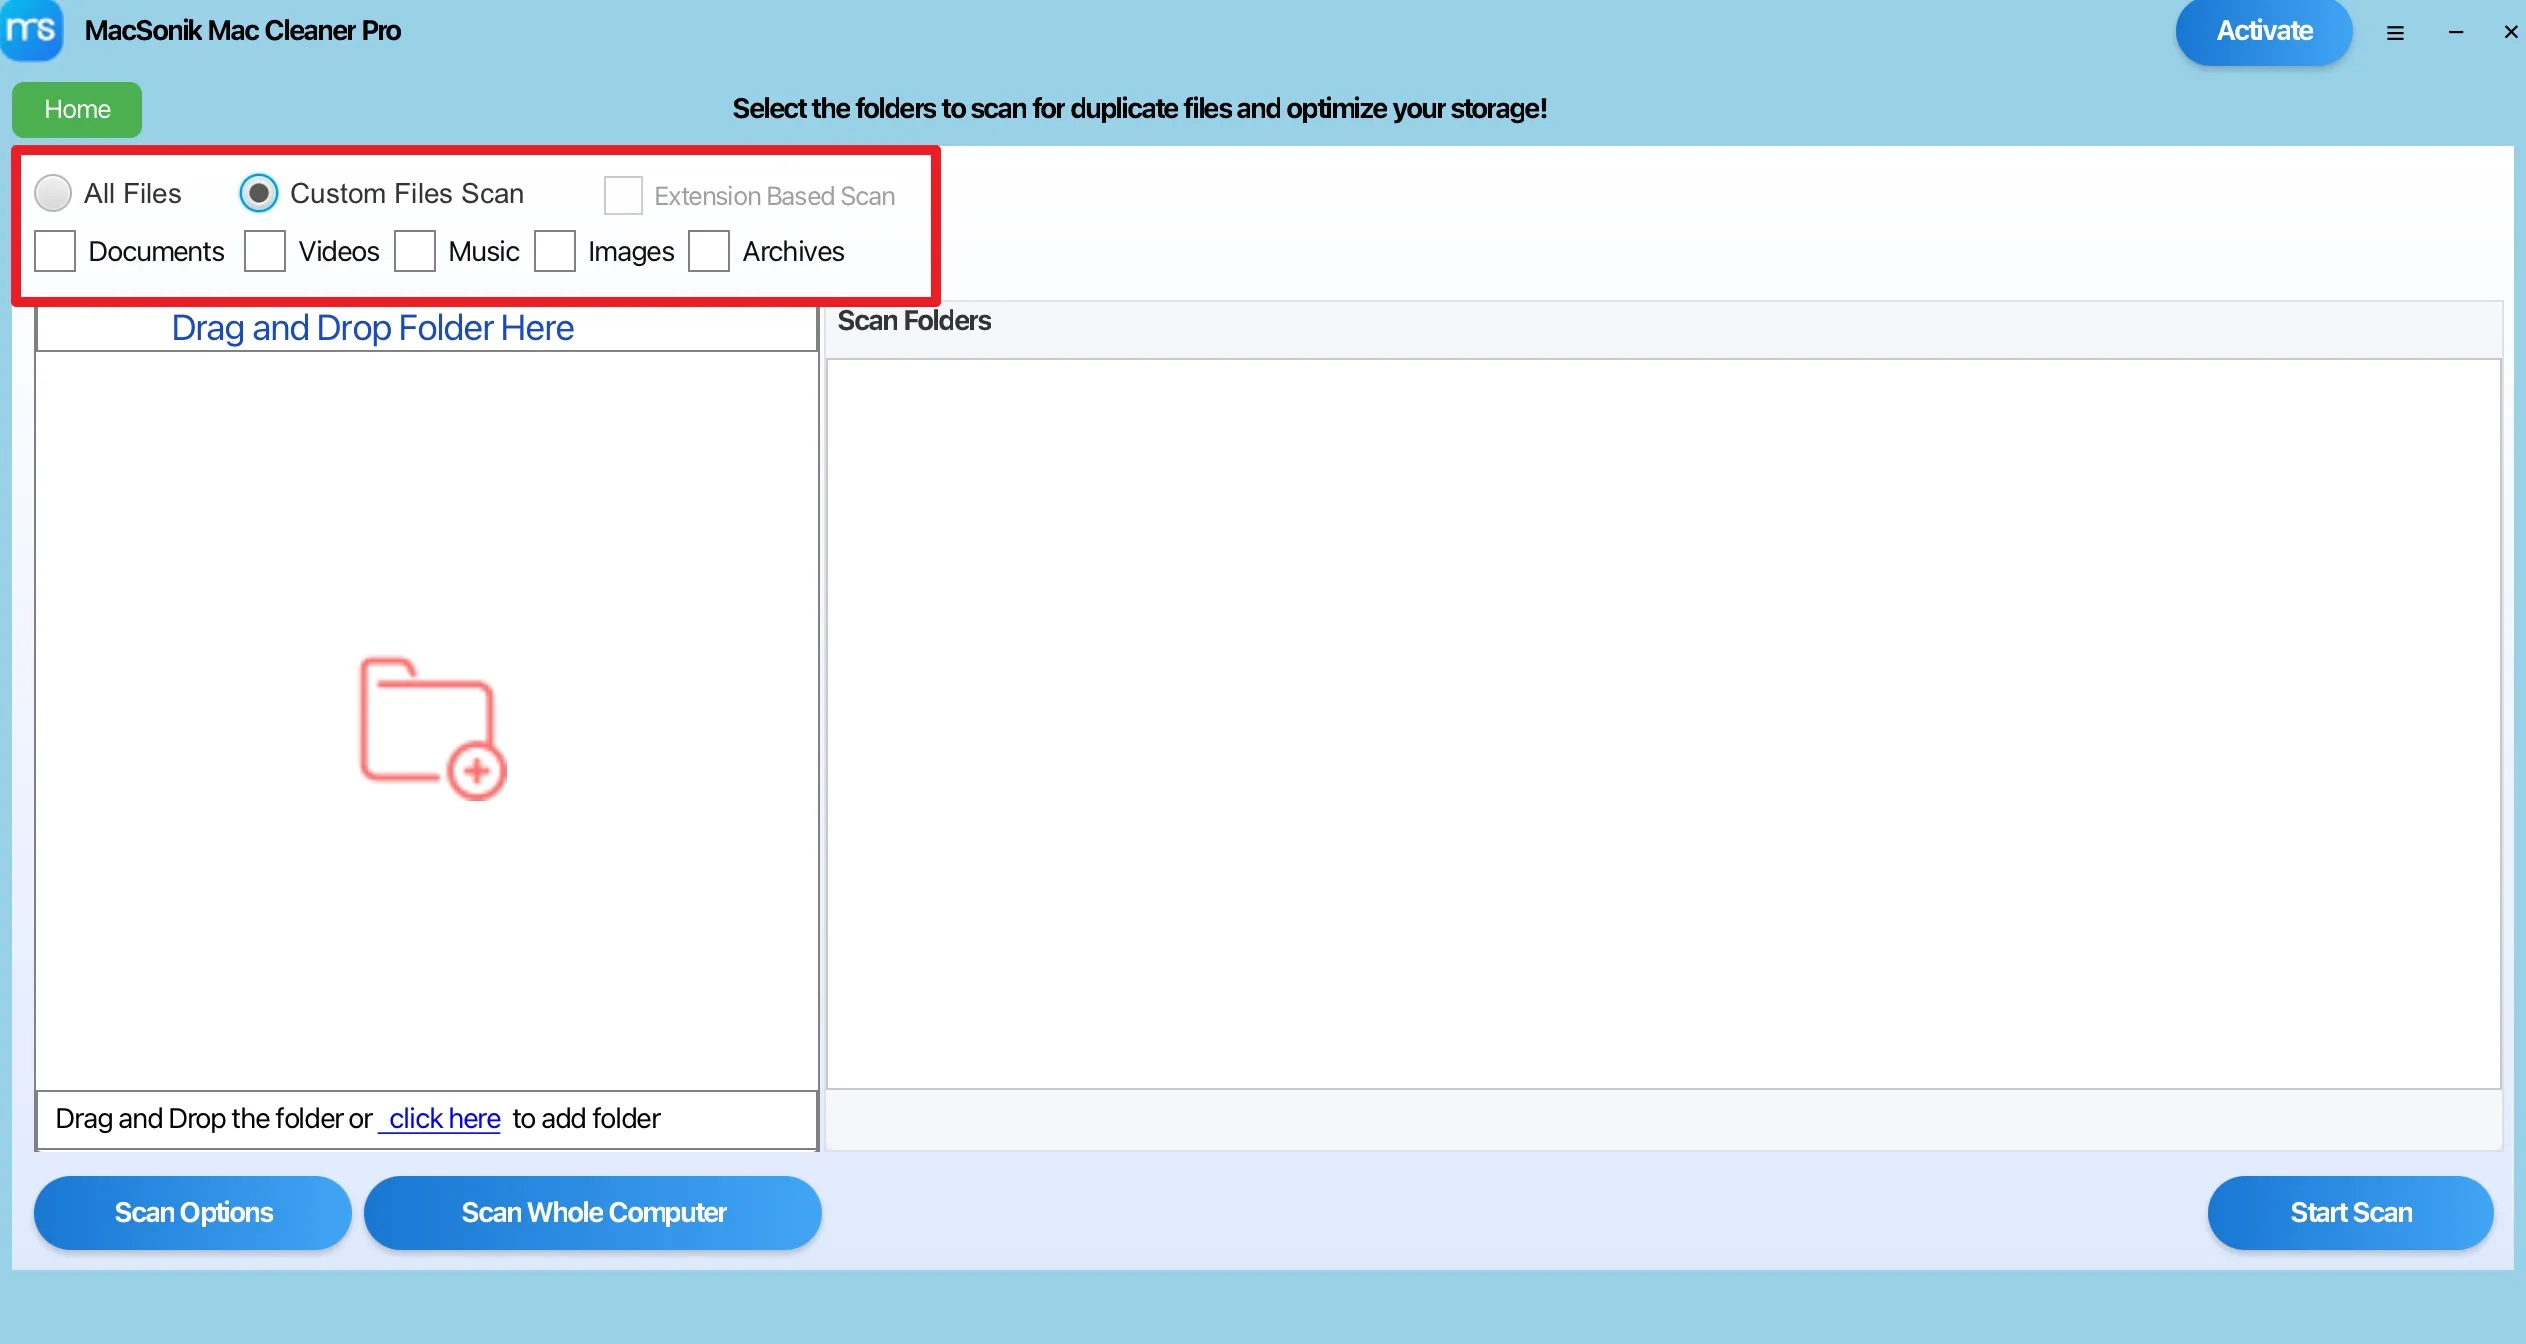
In the next panel, the following:
- ‘Scan’ Options: Opens the advanced configuration to refine search criteria and protect specific system data.
- File Protection: allows you to safeguard sensitive areas by skipping the desktop, applications, hidden folders, or system files during the scan.
- File Date filters: the scan results based on when files were created or last modified.
- Ignore Files: sets specific minimum or maximum file size thresholds to exclude very small or very large files from the search results.
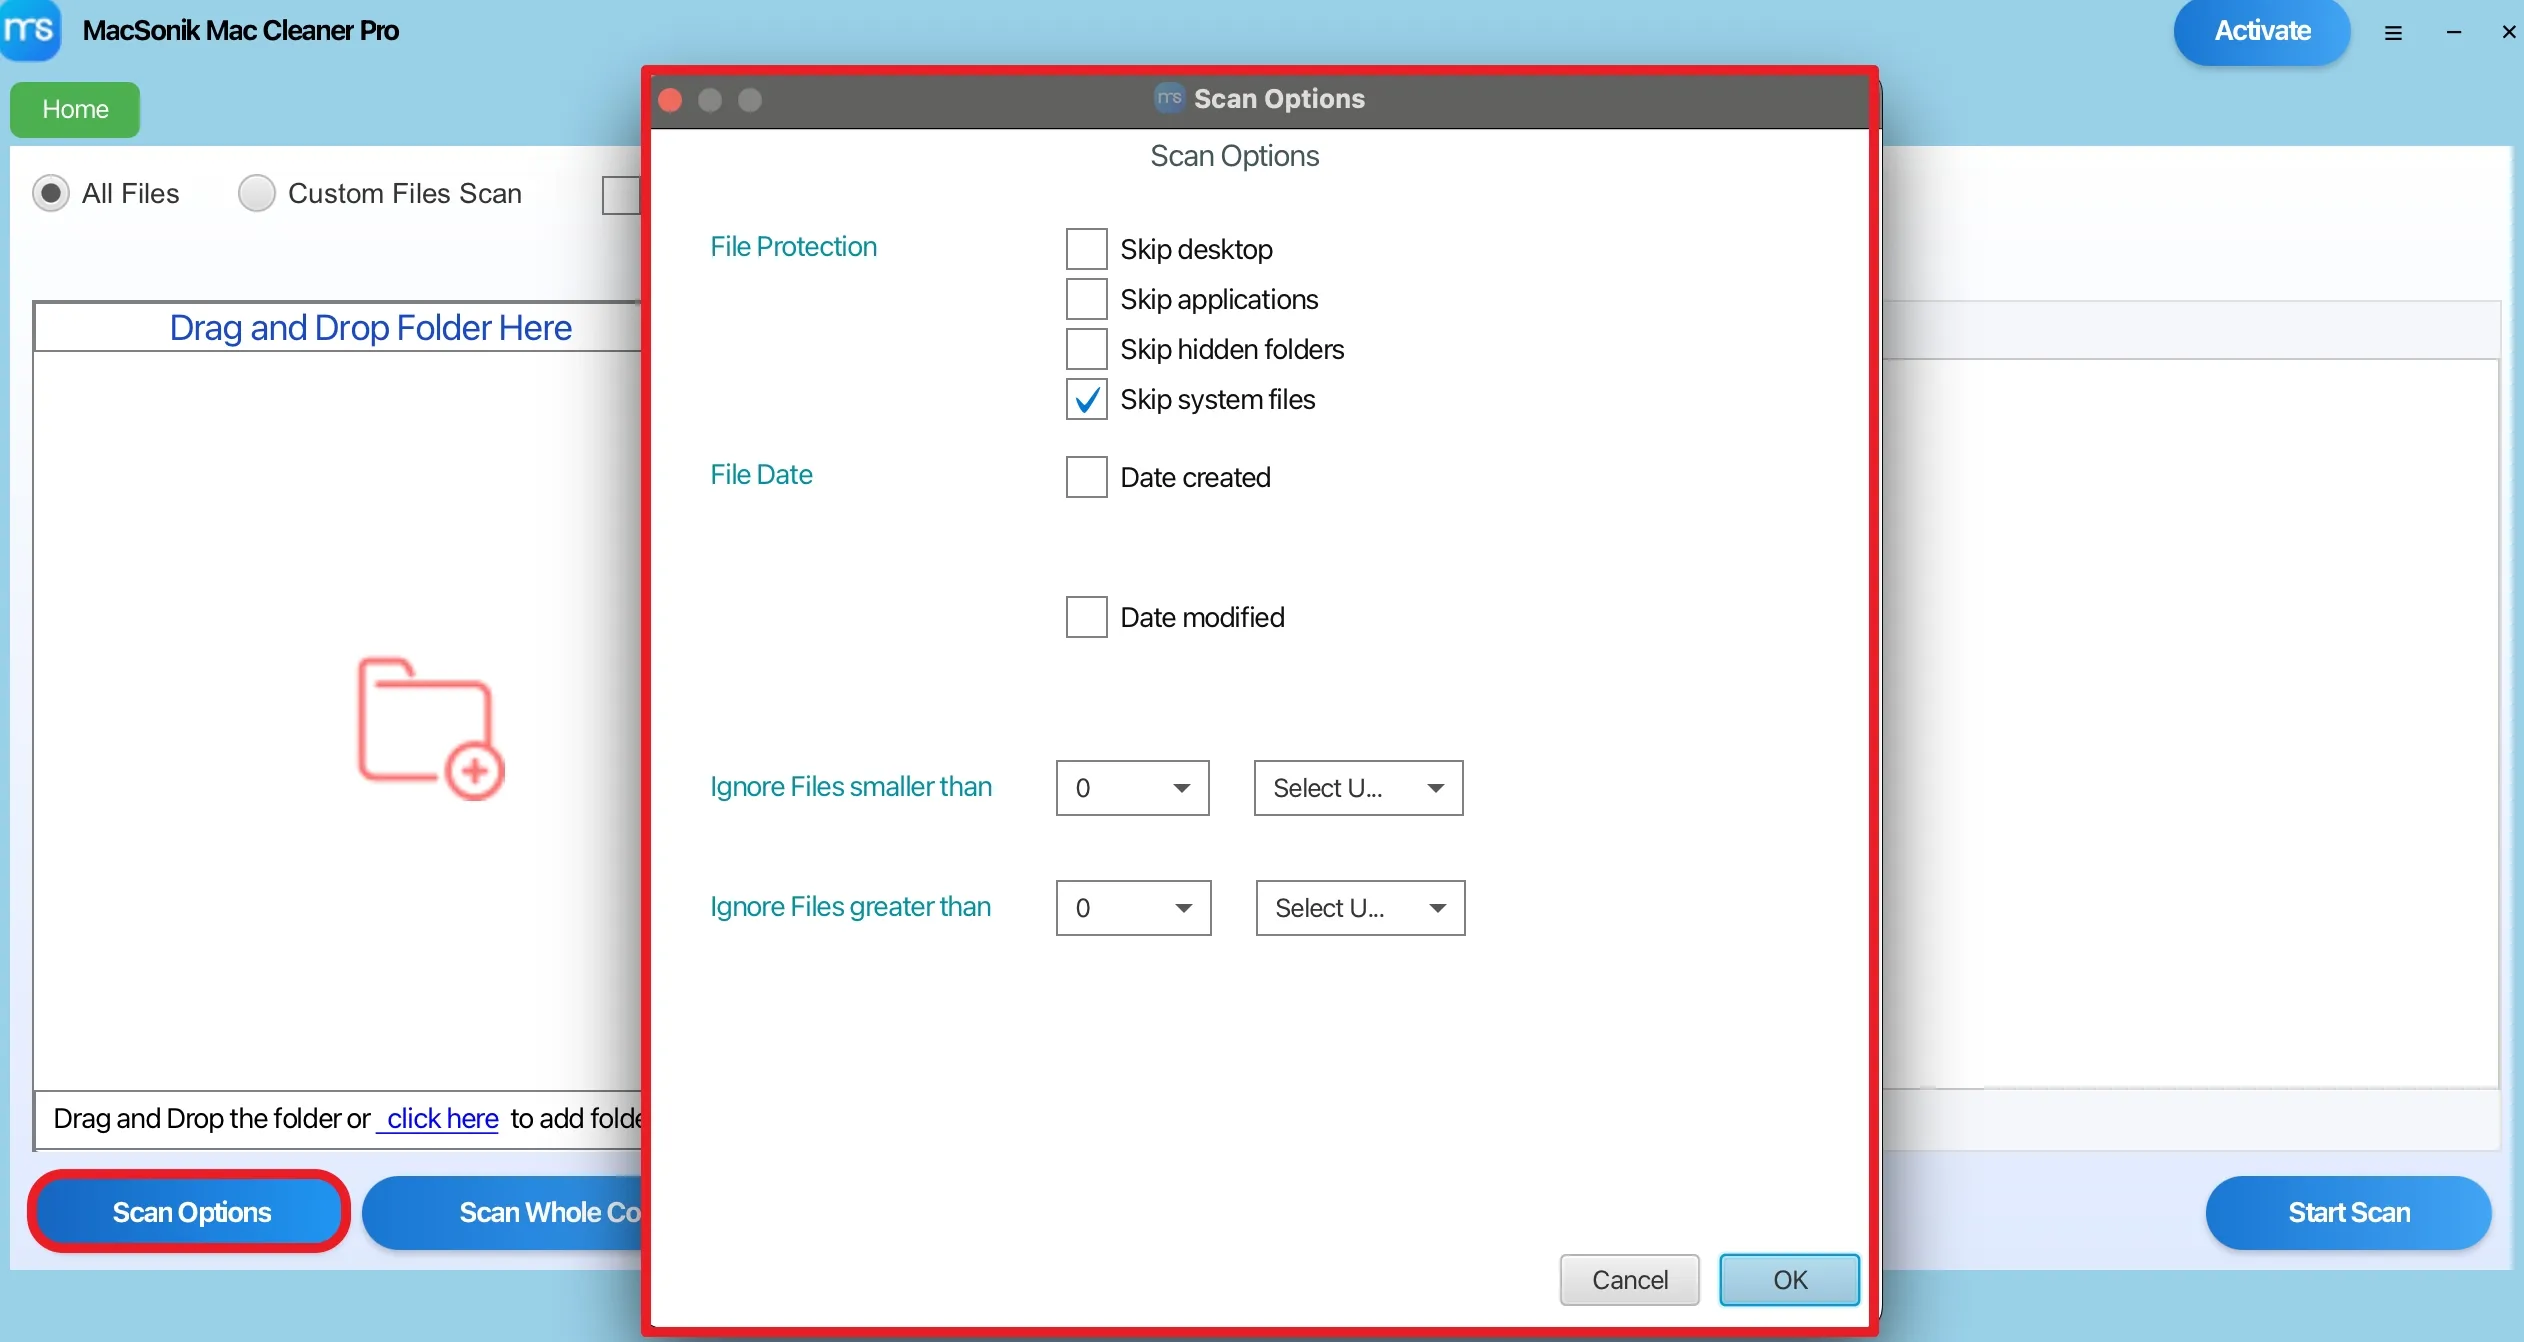
‘Scan Whole Computer’: Allows you to automatically select and search all available directories on your Mac for similar files.
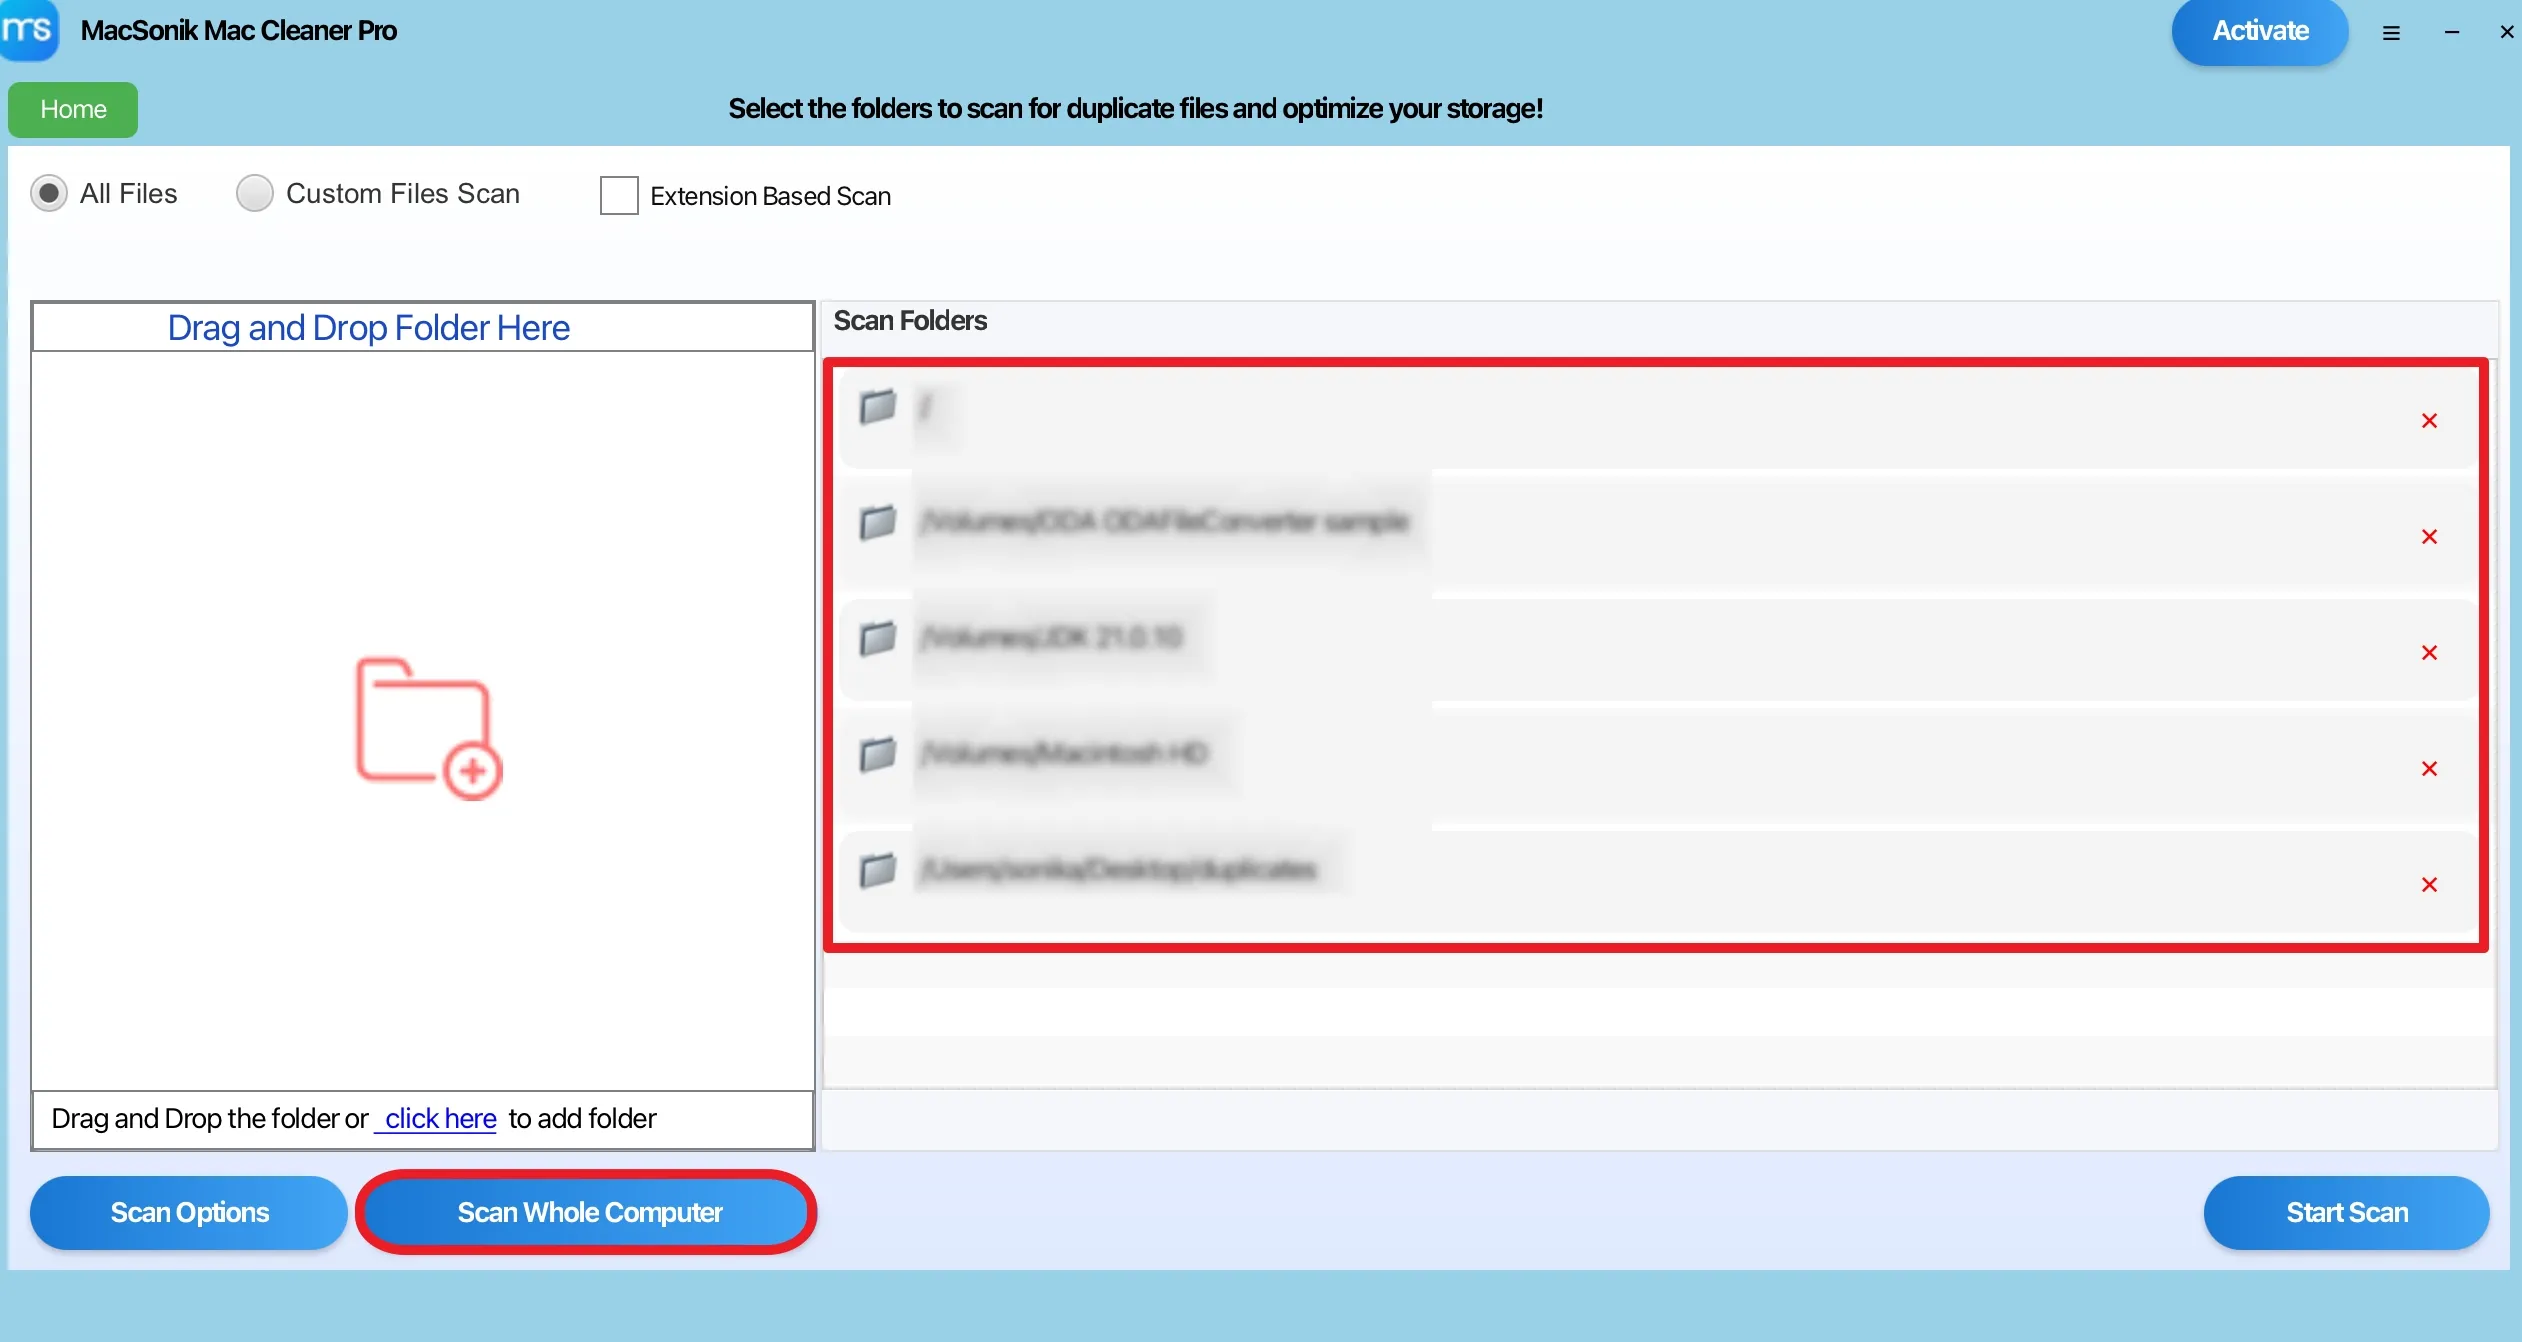
Now, use the ‘Drag & Drop’ option to add the folders of which duplicates you want to remove, and ‘Start Scan’.
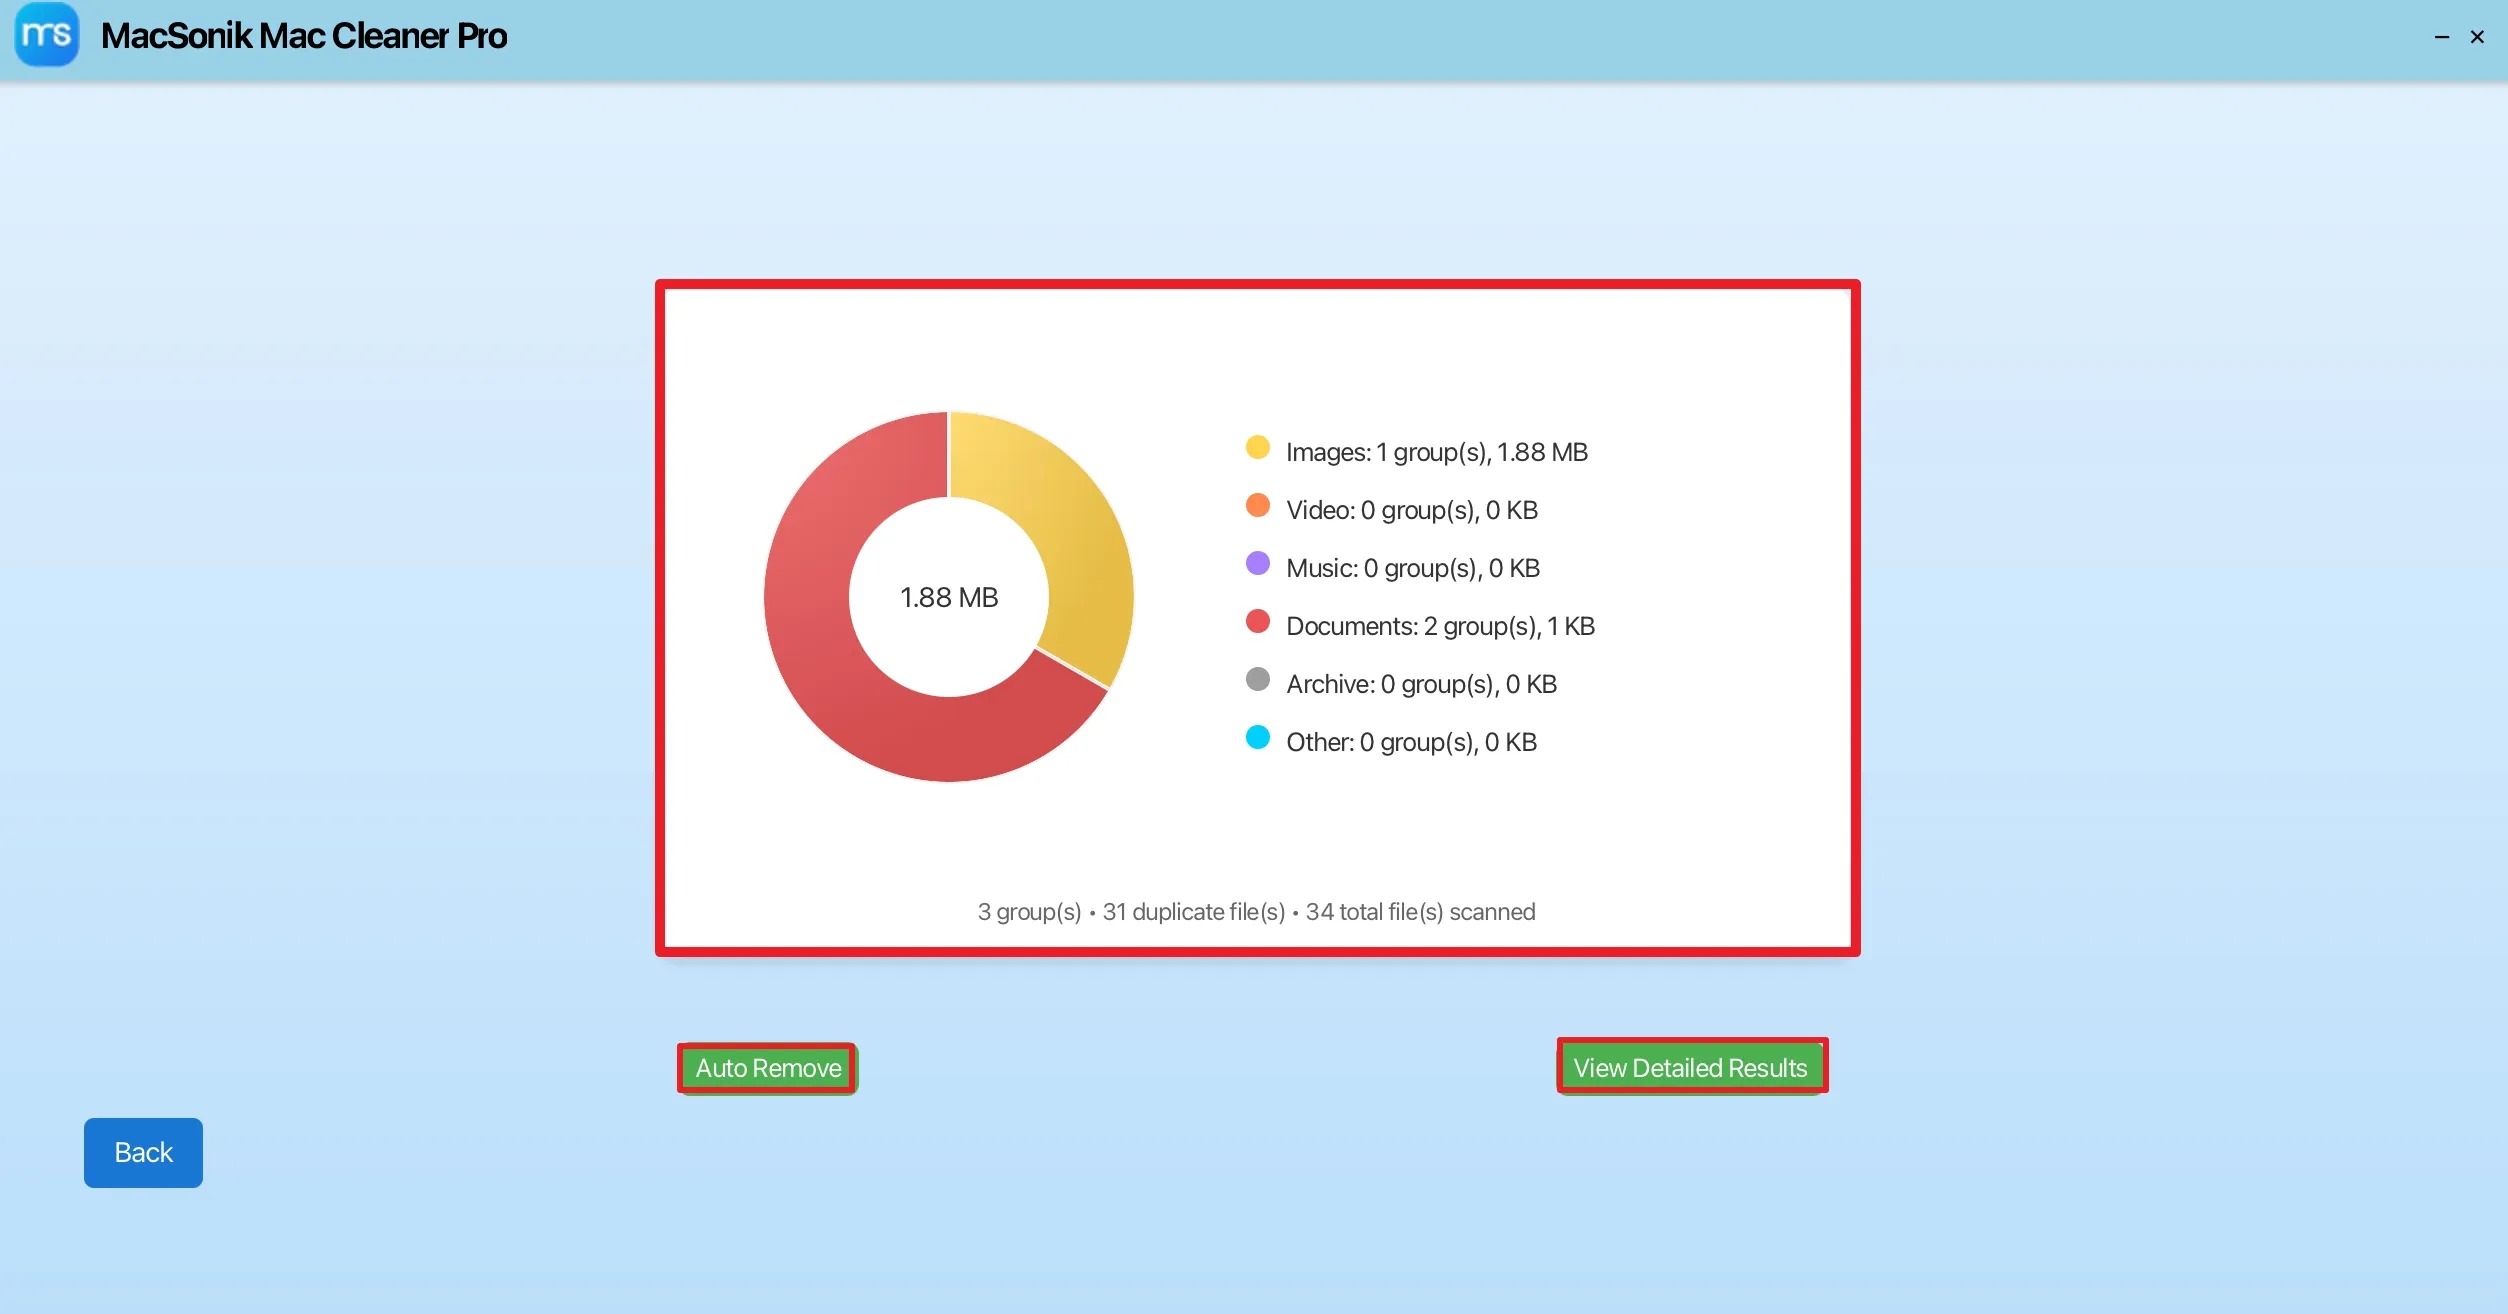
Afterwards, a ‘duplicate summary chart’ provides a visual breakdown of found duplicates by category (Images, Video, Music, etc.) and the total storage space they occupy.
- ‘Auto Remove’: Automatically deletes all identified duplicate files to reclaim disk space.
- ‘View Detailed Results’: Opens a list of all discovered duplicates, allowing you to manually review and select specific files before removal.
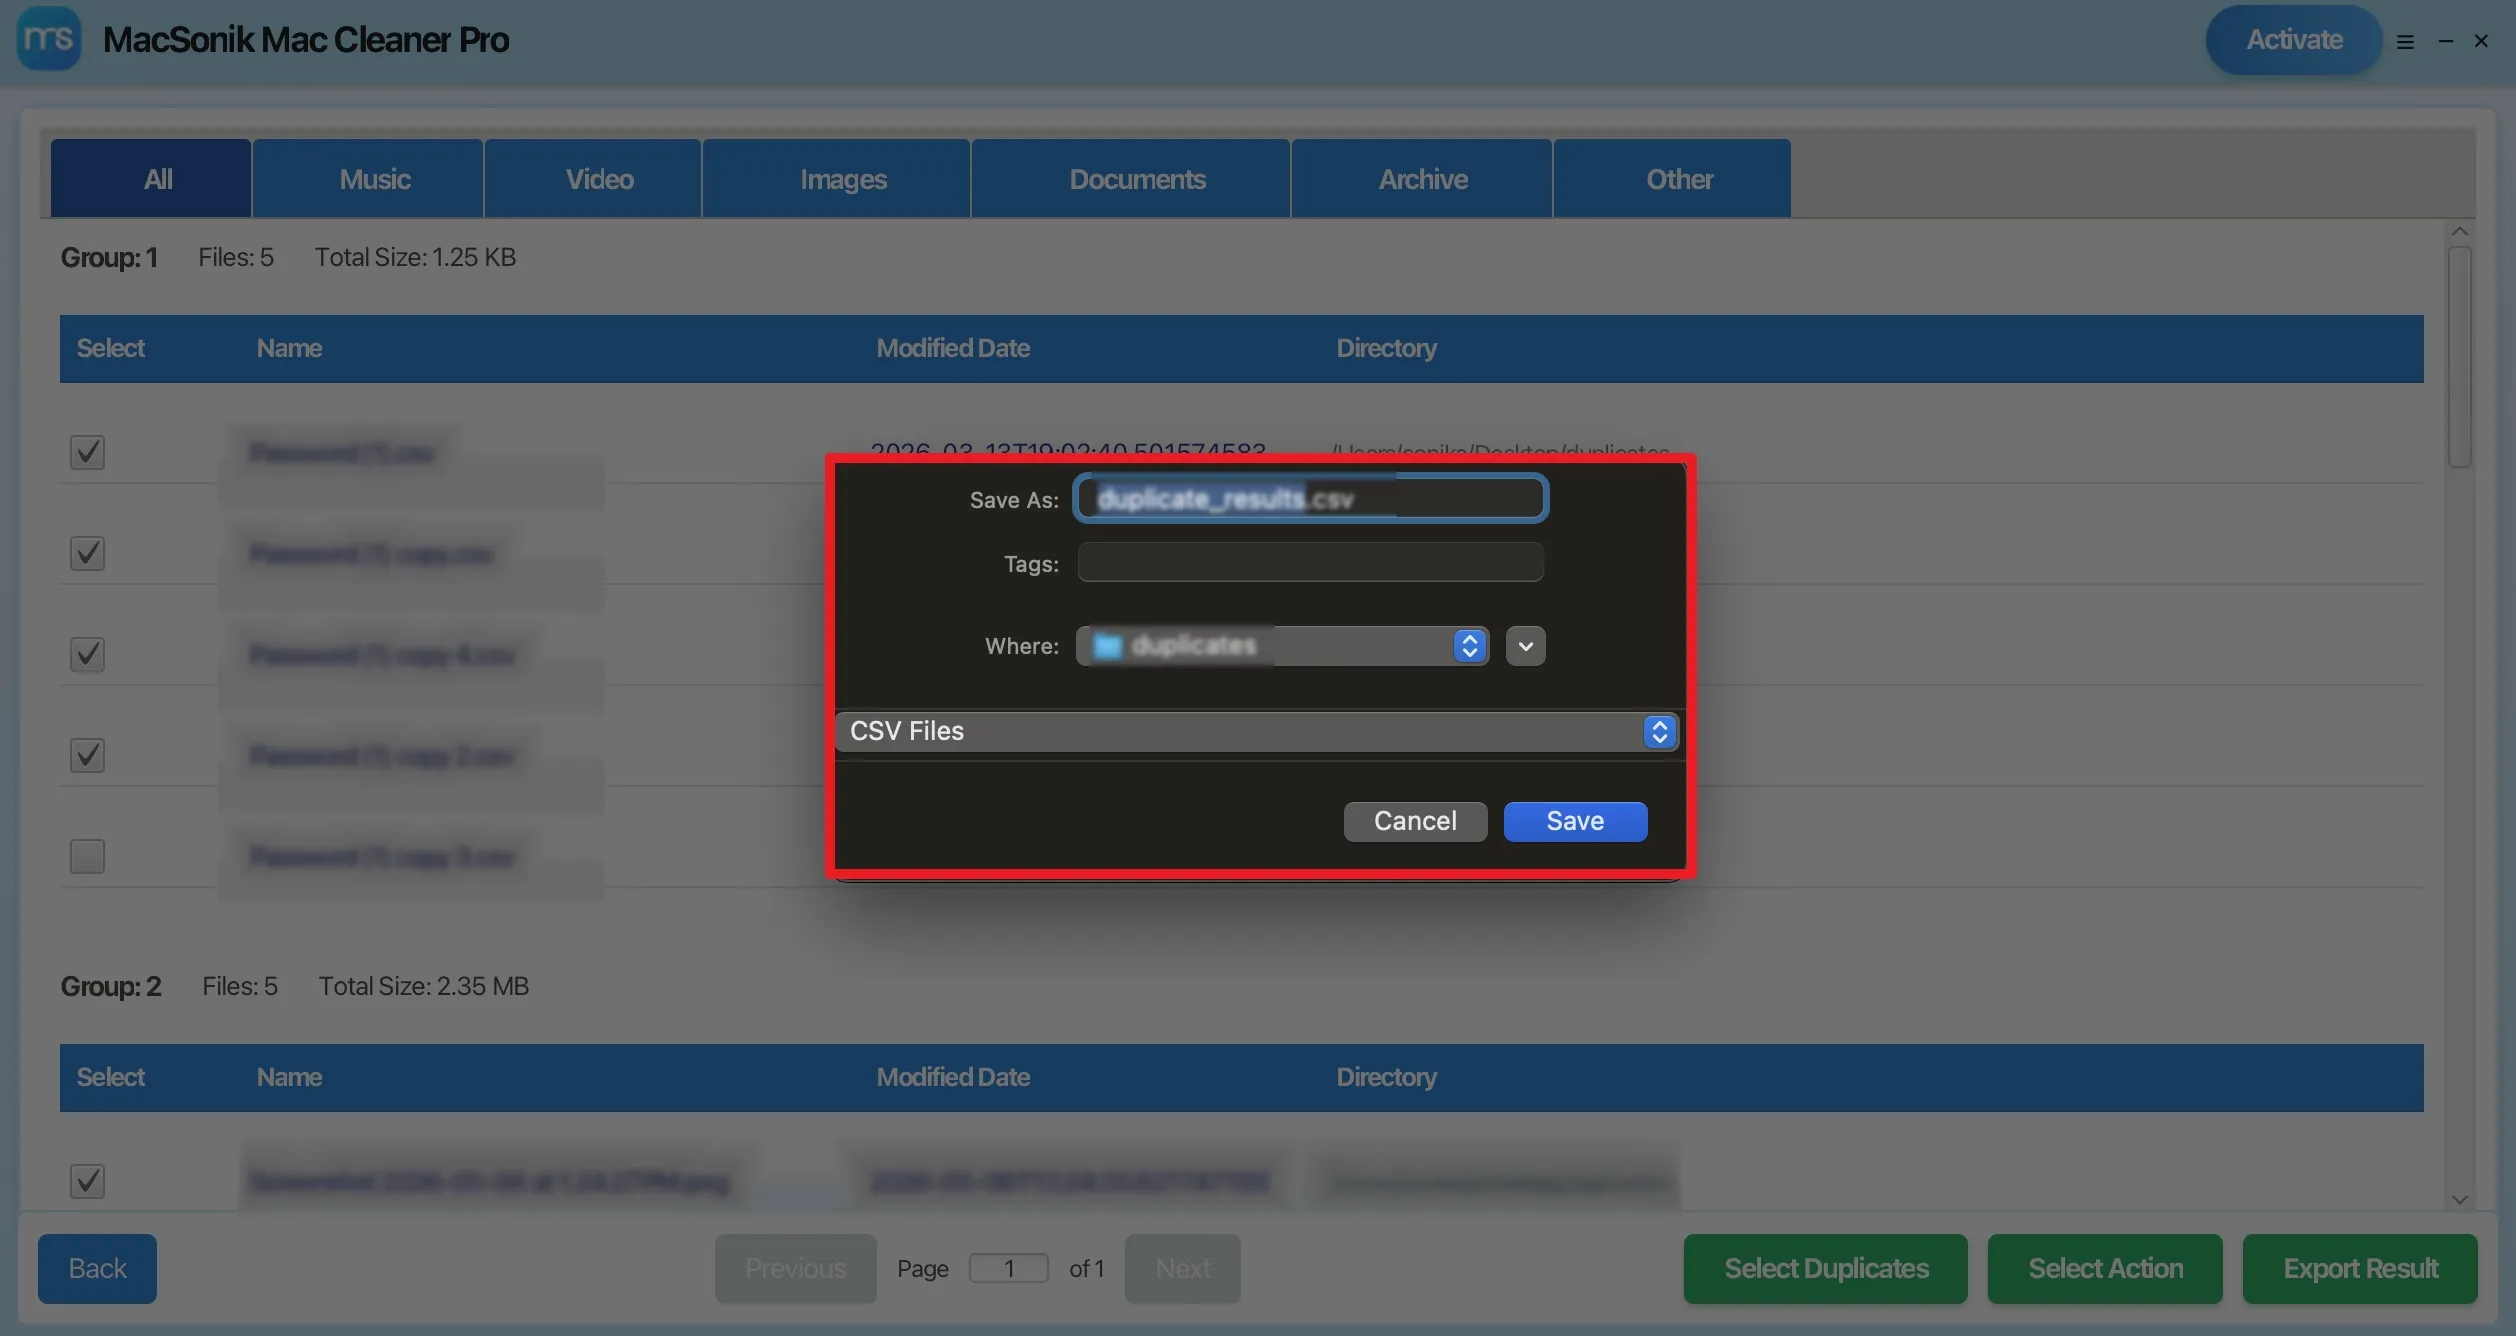
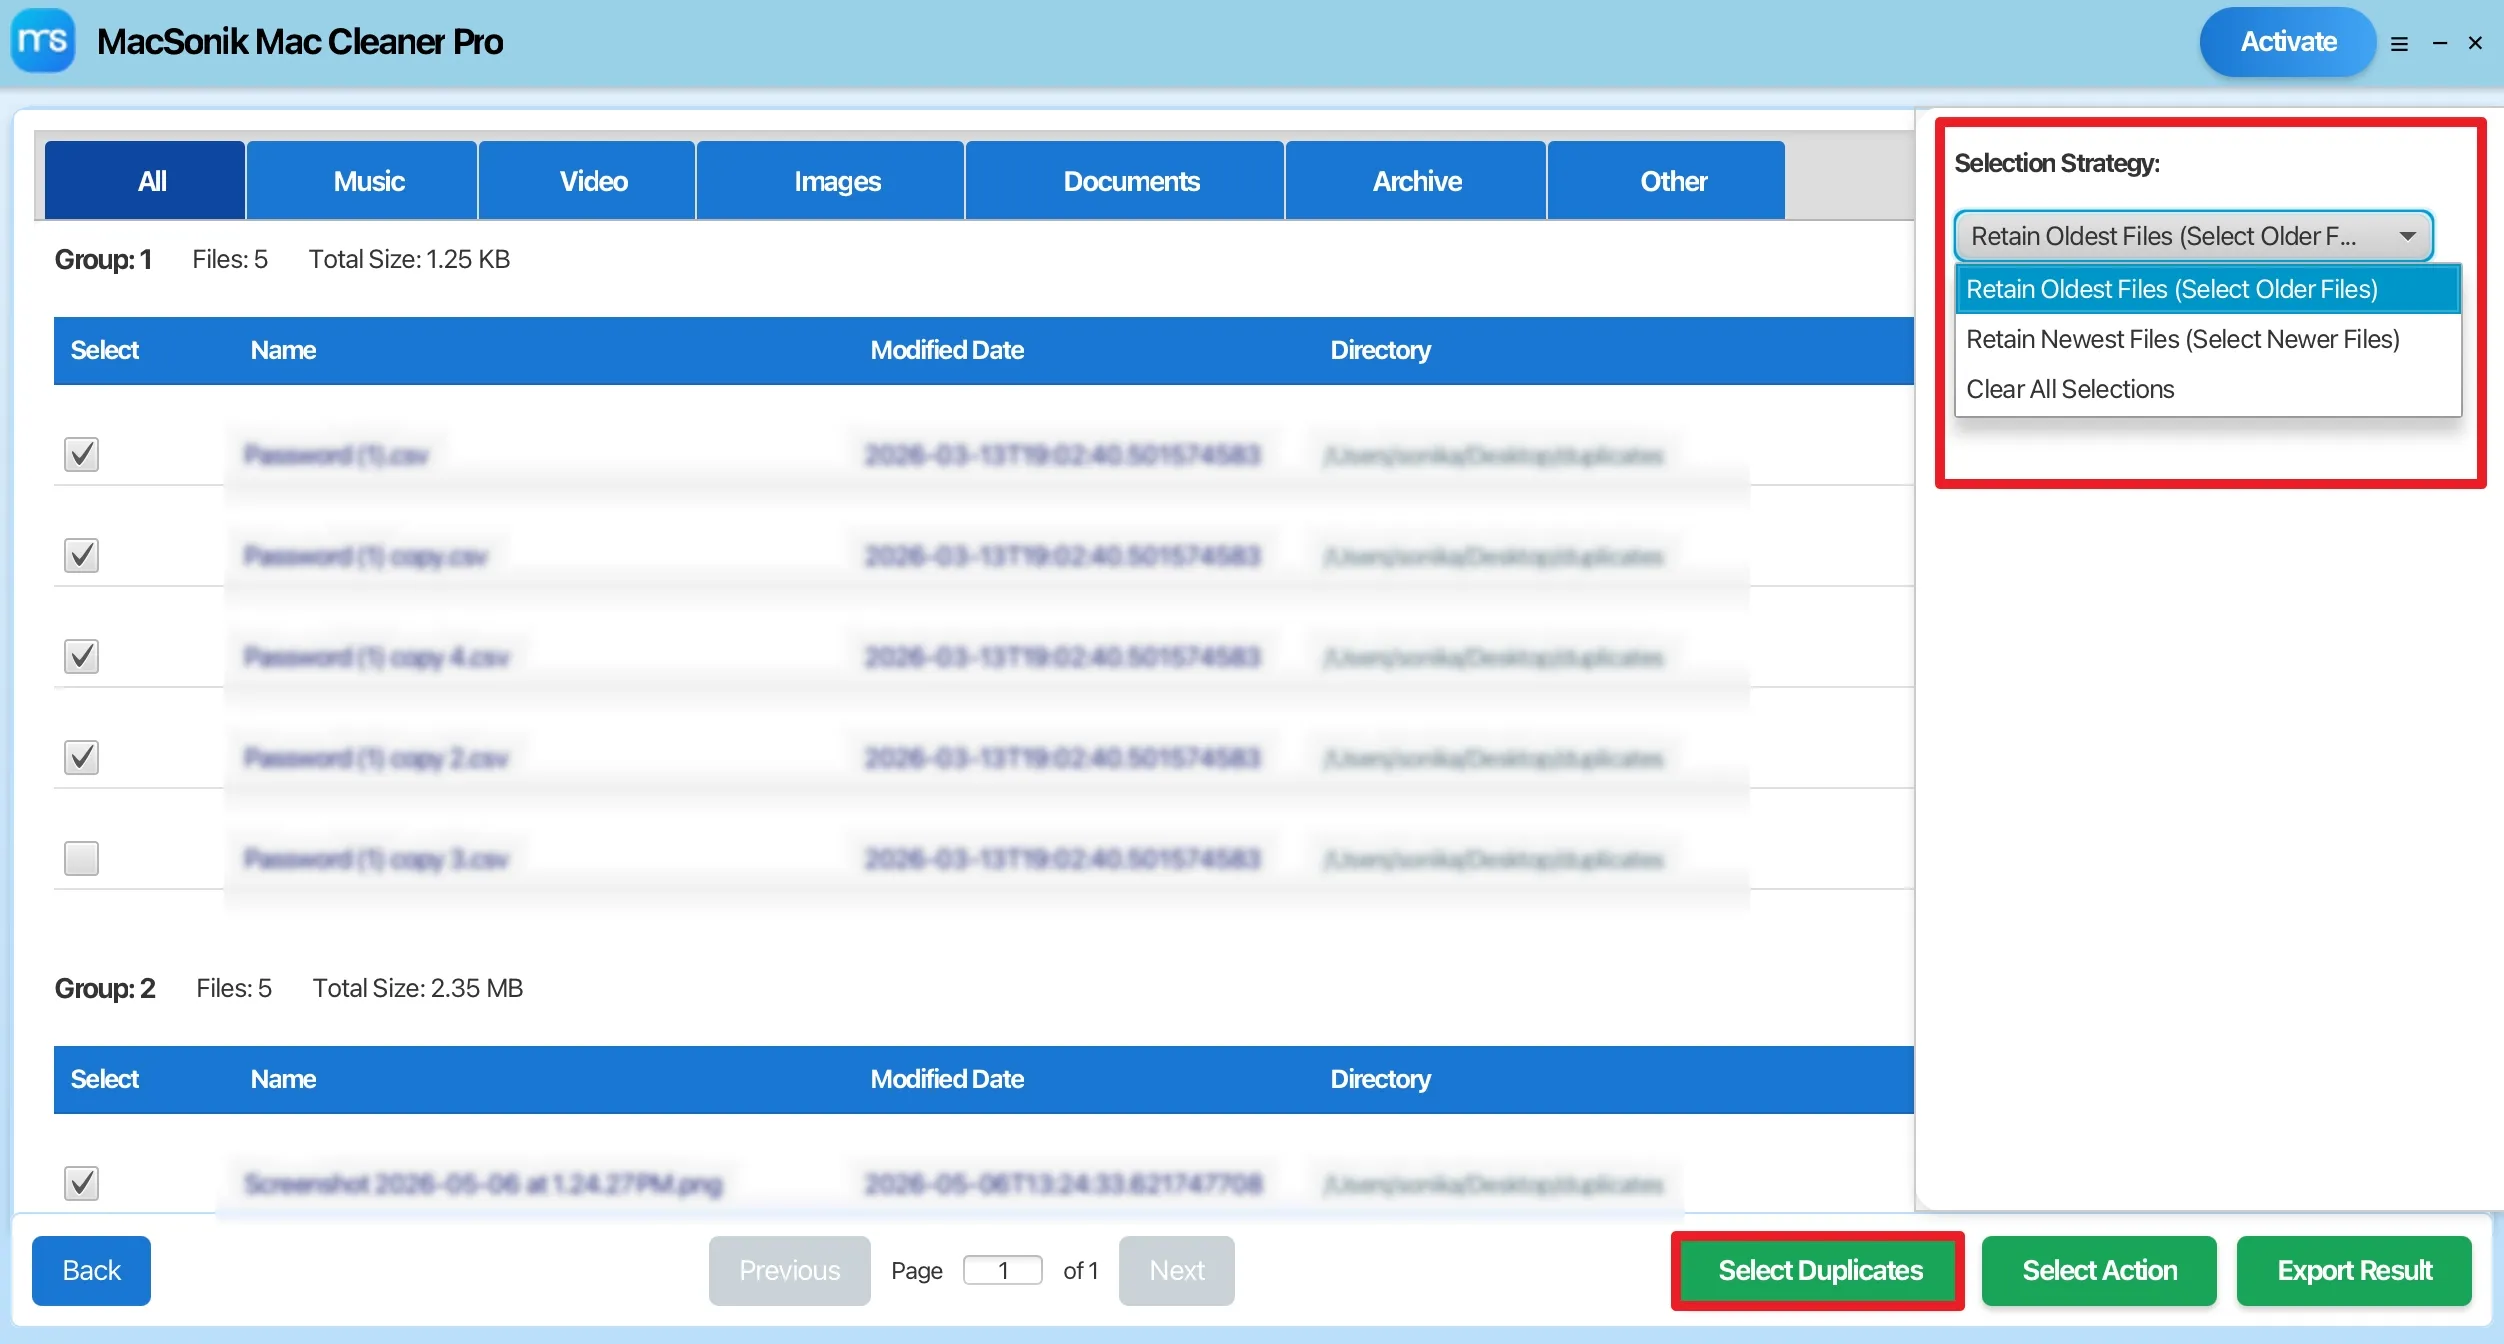
Furthermore, preview the scanned files/folders and choose the actions to be performed next among ‘Select Duplicates/Select Actions/Export Result’.
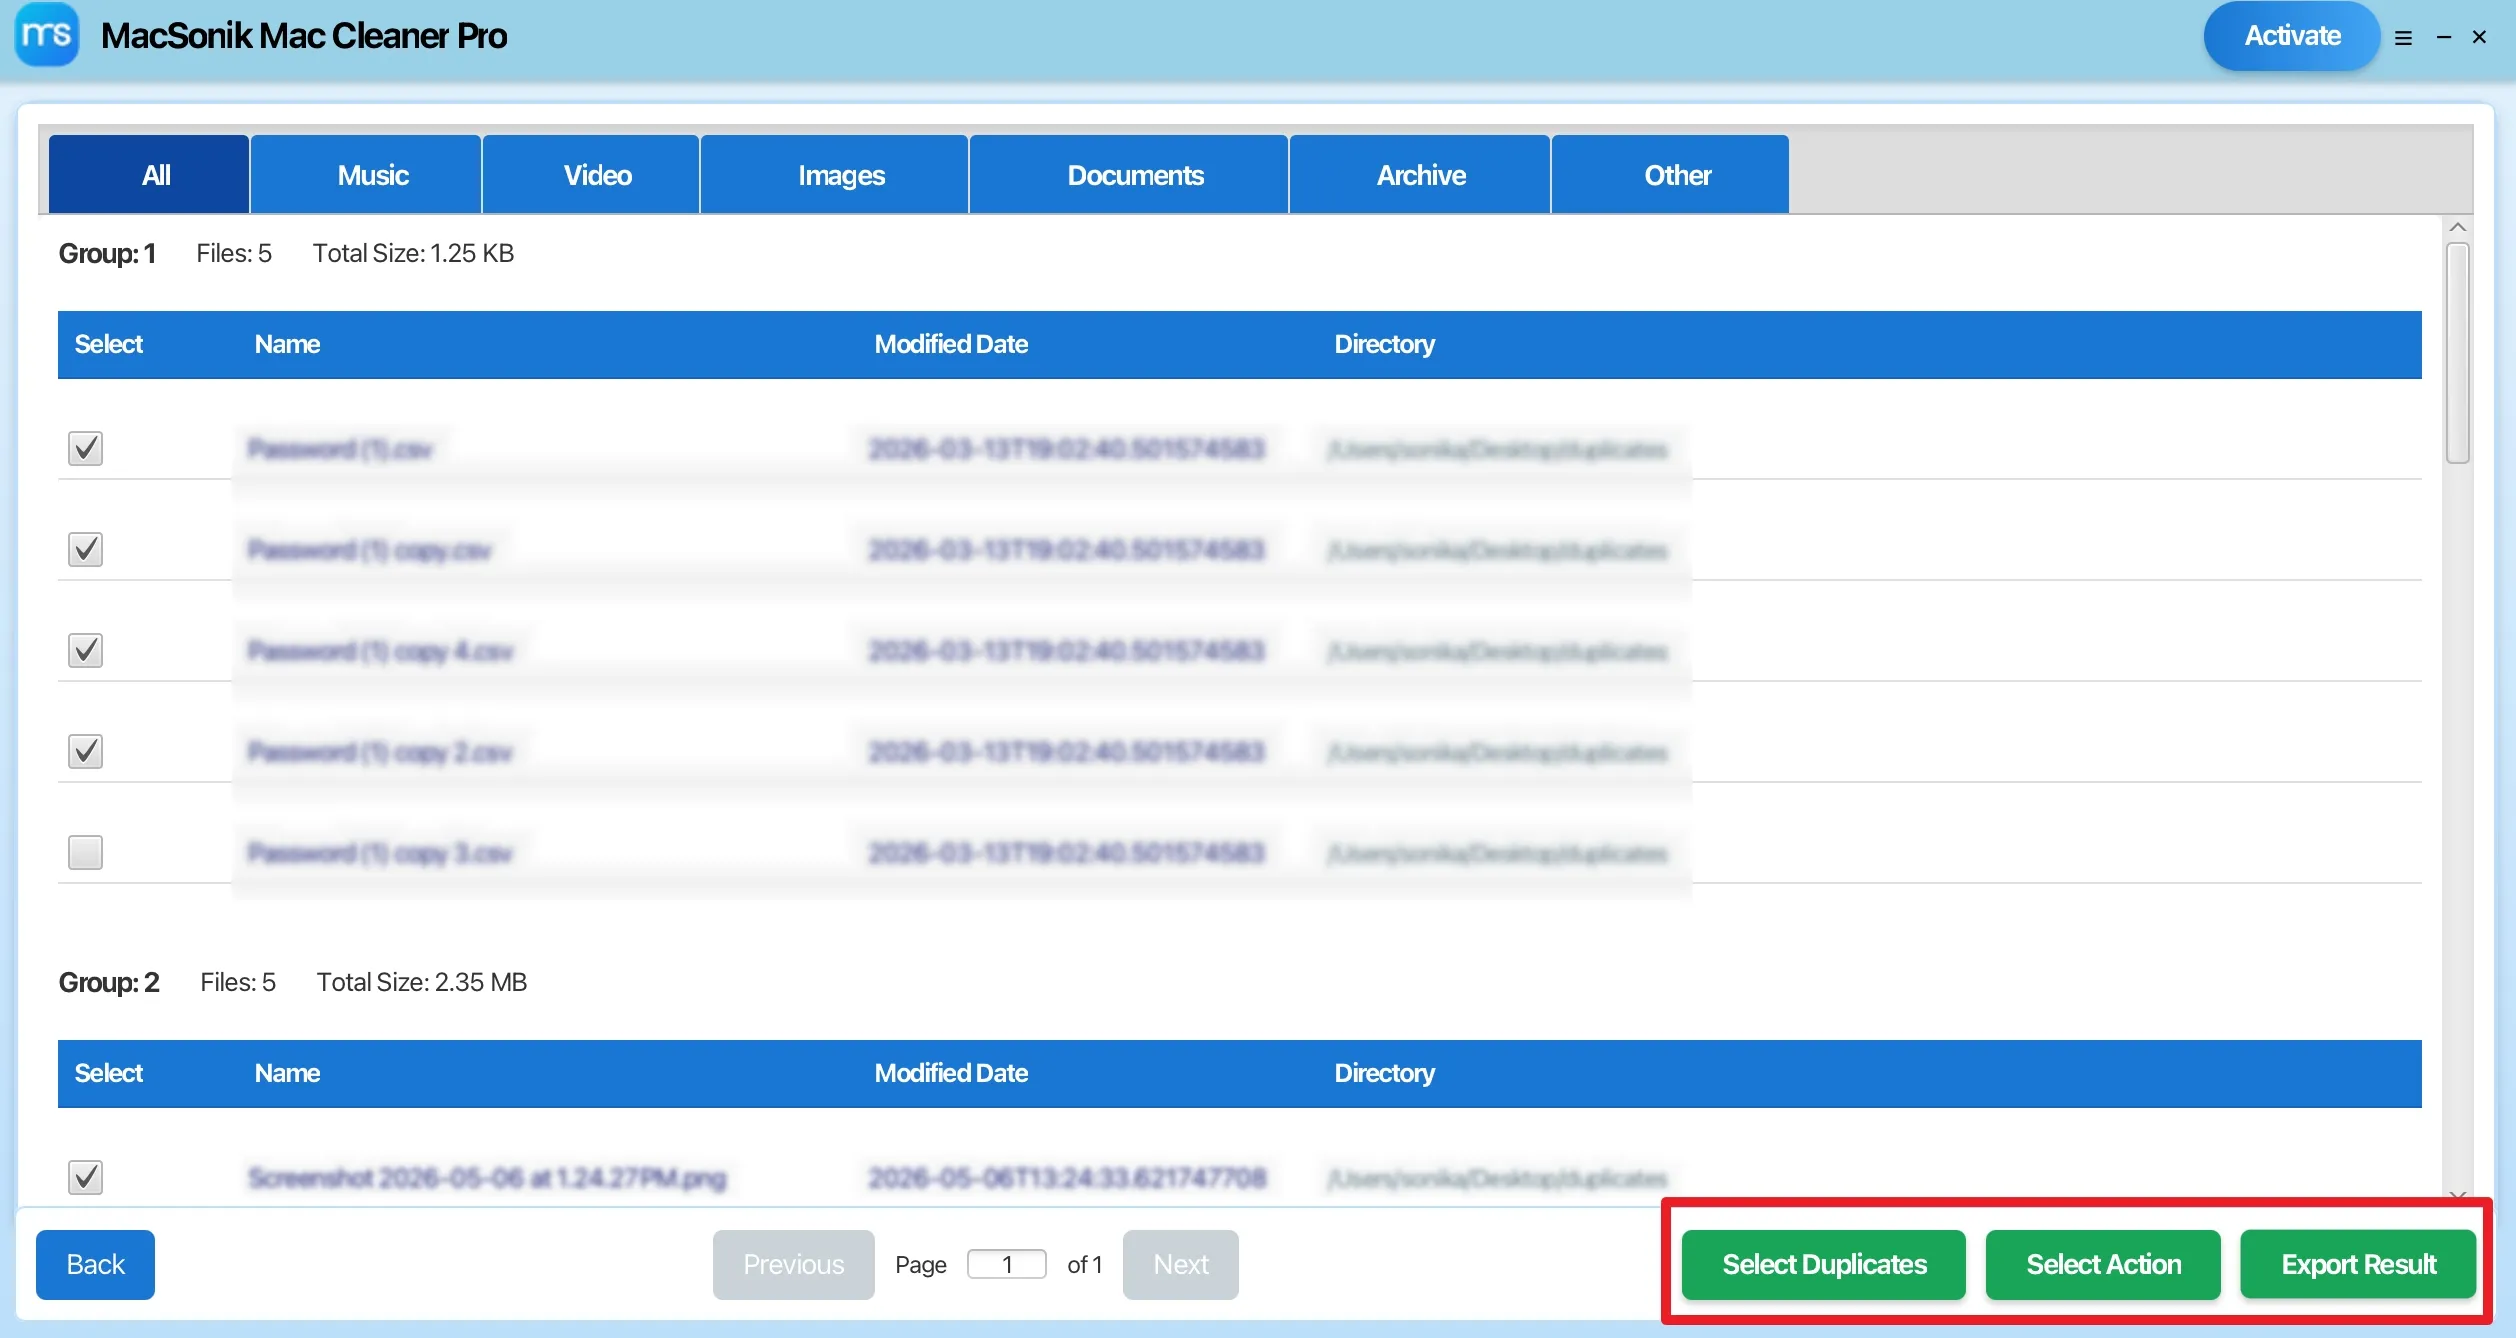
‘Select Dupicates’: Allows you to choose automated logic for marking files, such as keeping only the oldest or newest versions within each duplicate group.
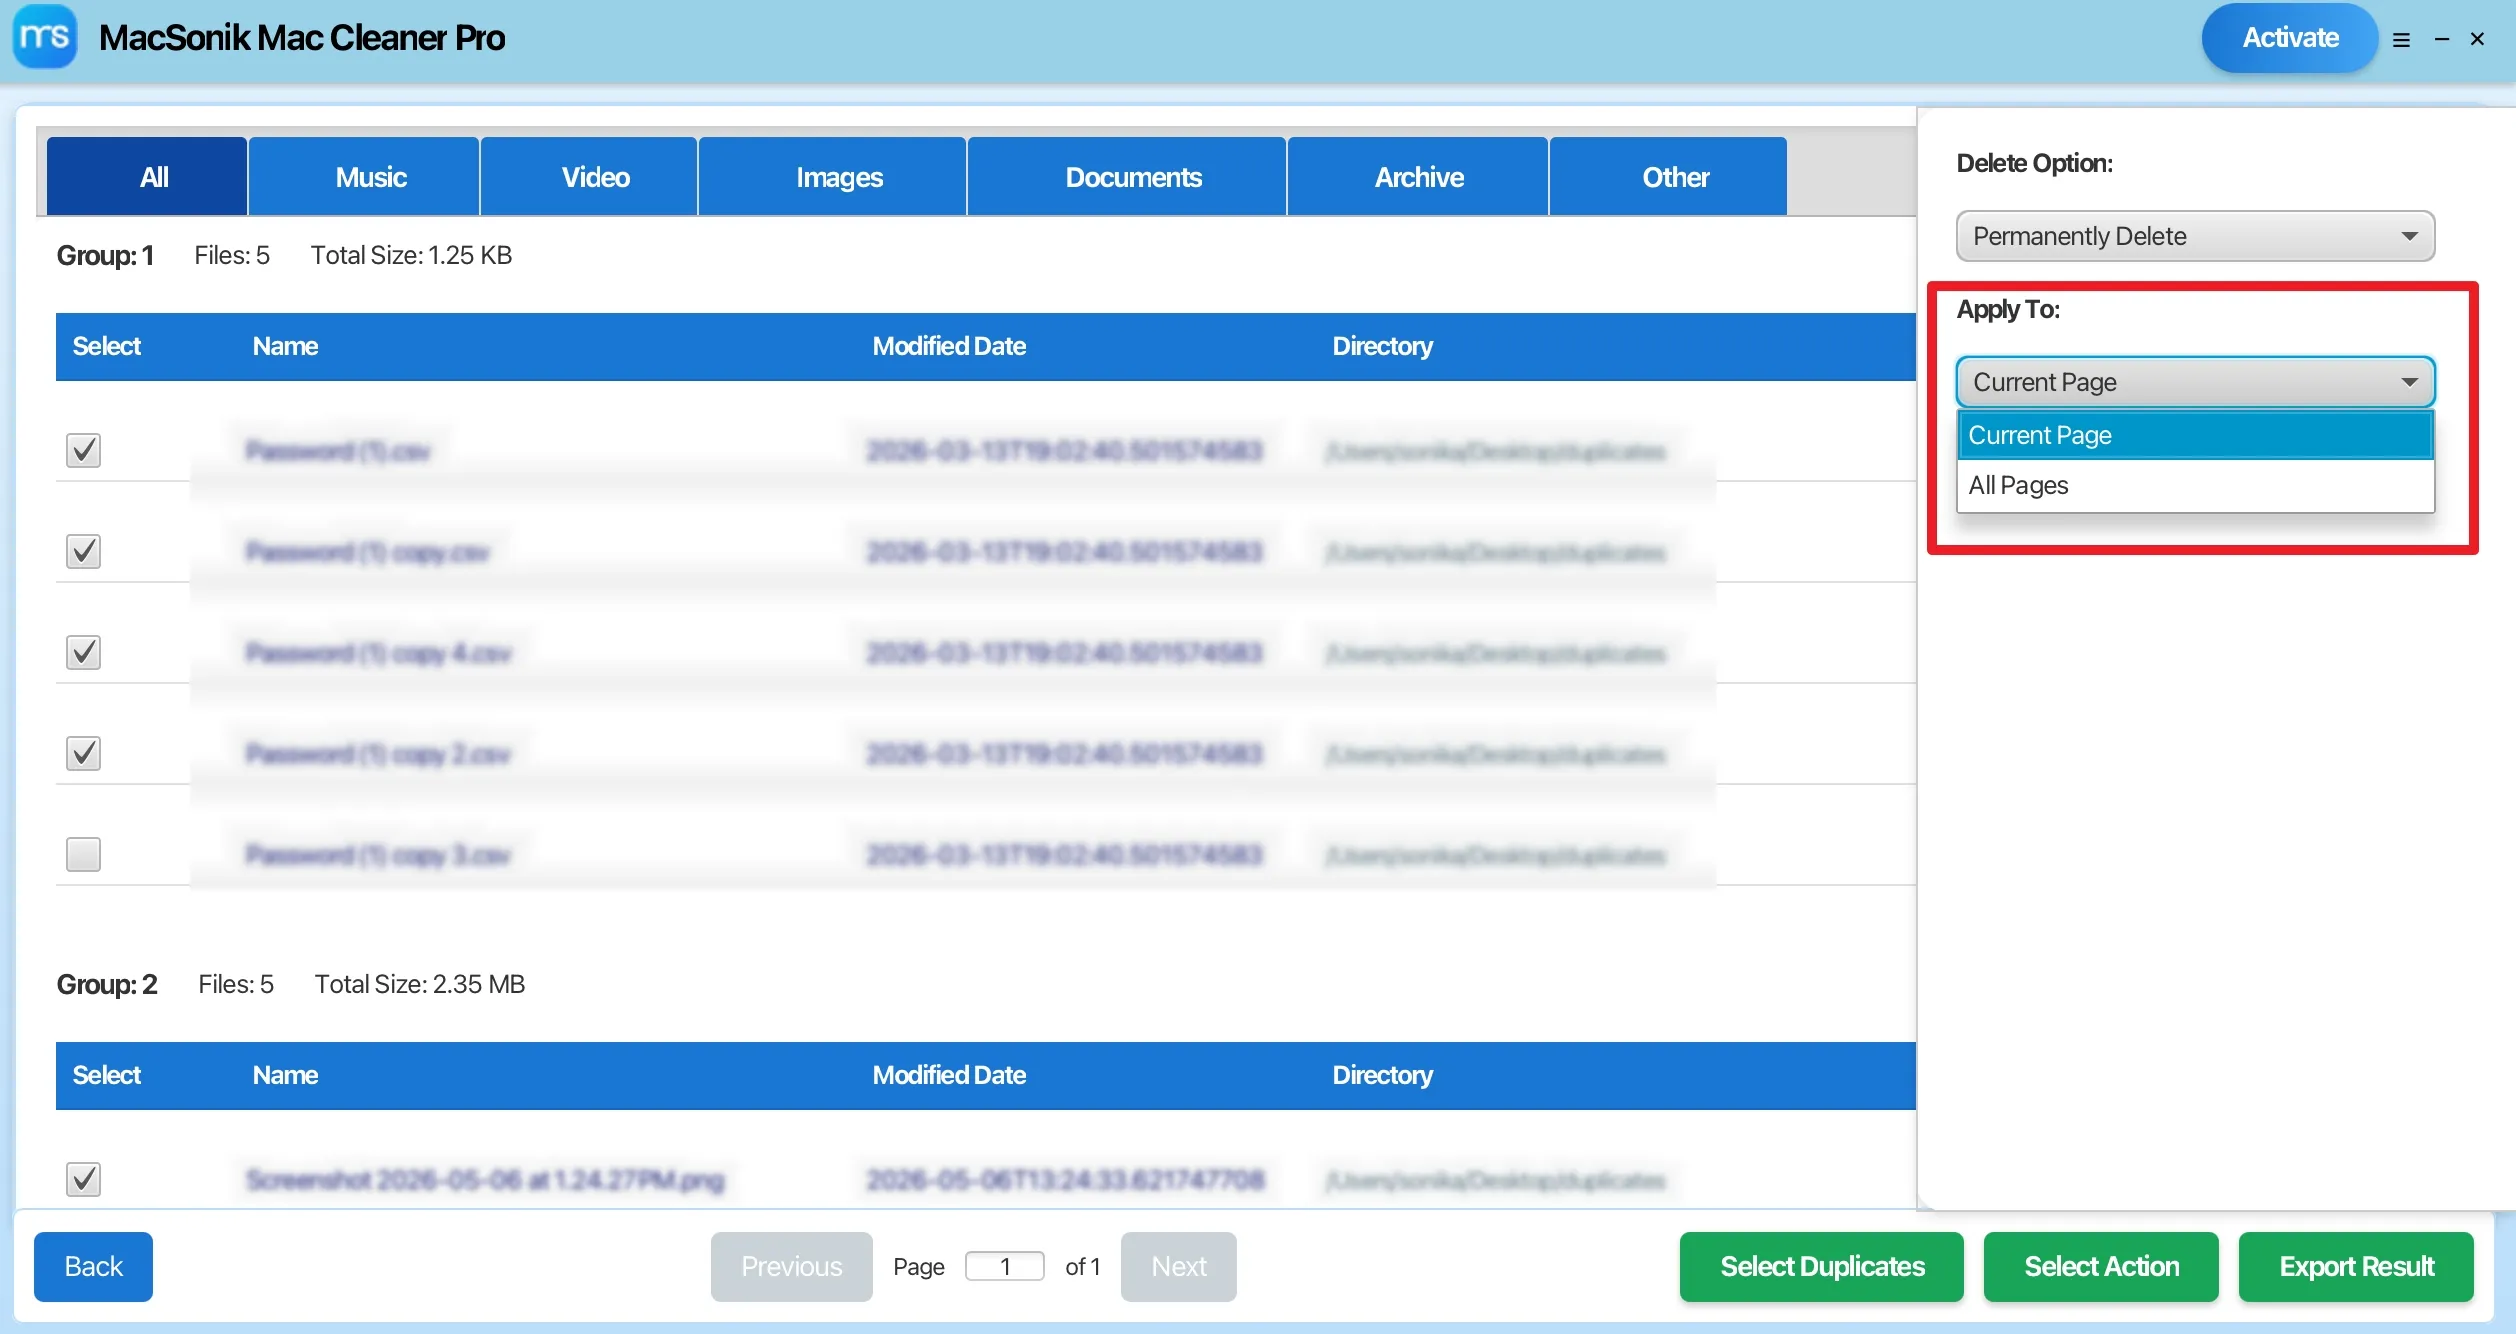
‘Select Actions’: It has the following two subdivisions: Delete Options allows you to choose between permanently removing files, moving them to the Bin for safety, or relocating them to a specific folder for further review.
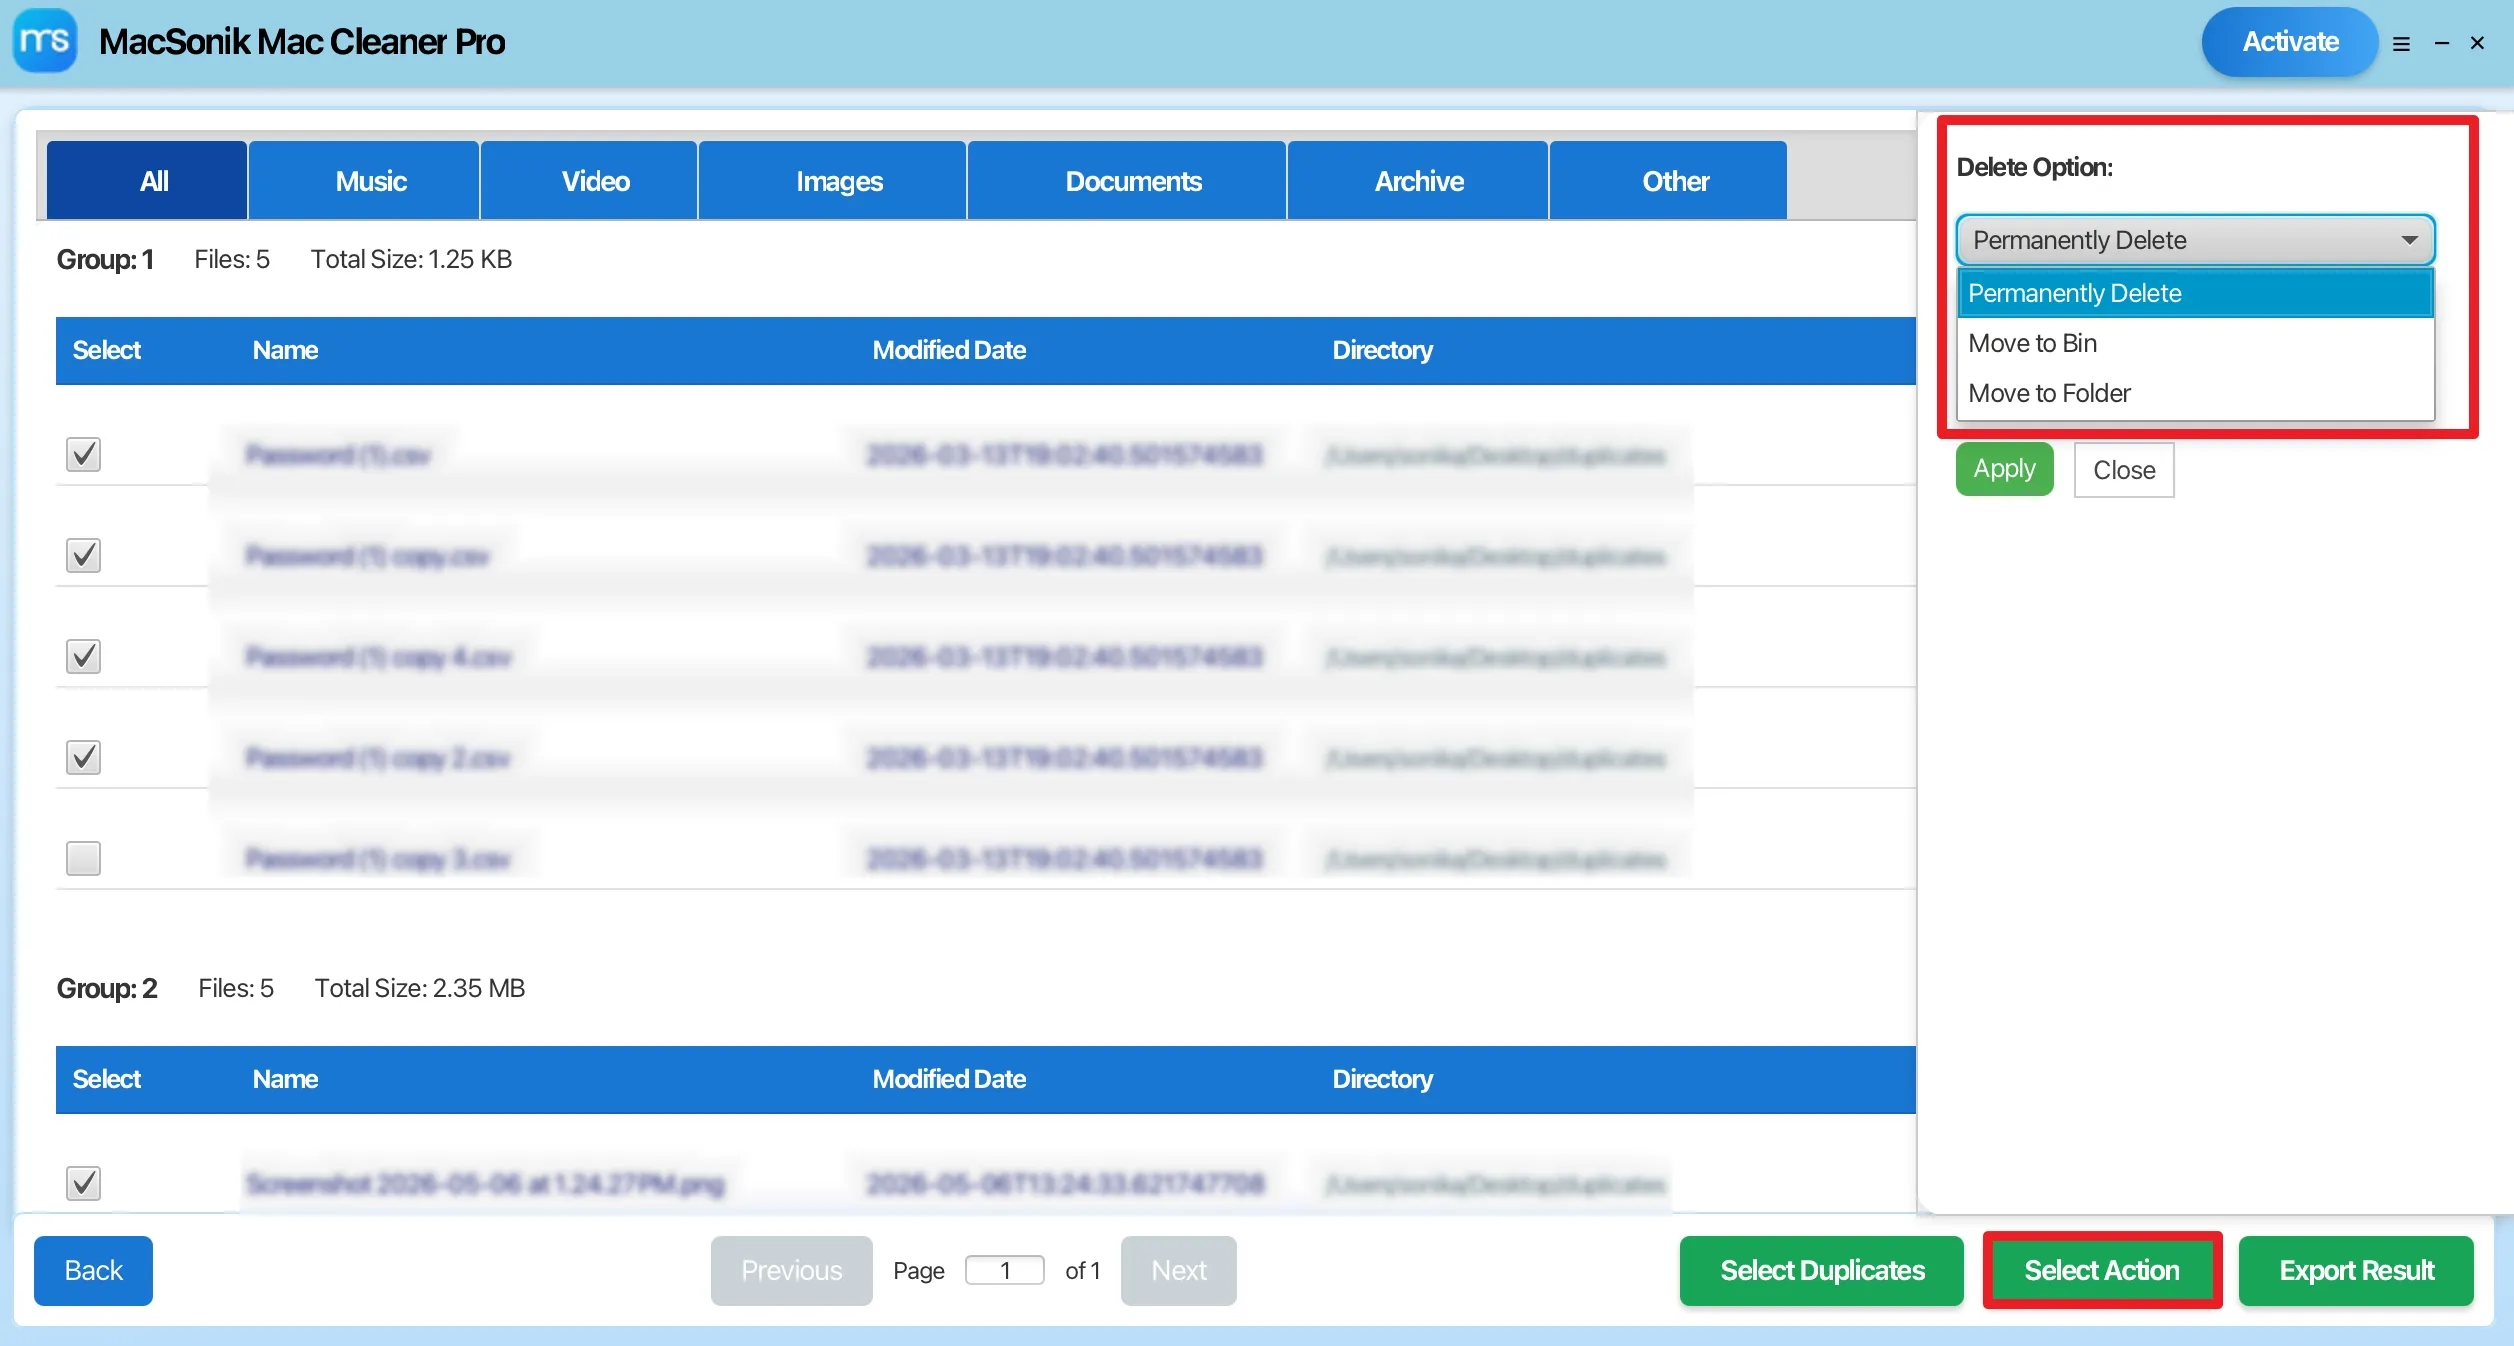
Apply To Menu allows you to choose whether to execute the selected deletion action only on the Current Page of results or across All Pages in the list.